Docker for Windowsをインストール
Macではなく
Windowsで行う、
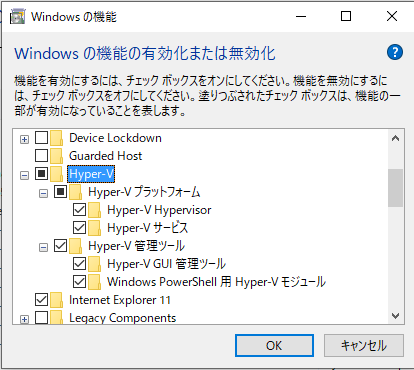
ただ、Windowsでの場合は「Hyper-V」で動作するため、VirtualBox使えない
いや、まあ古いやつならいけるけど、最新の使ってみたくなった
ダウンロード
hub.docker.com
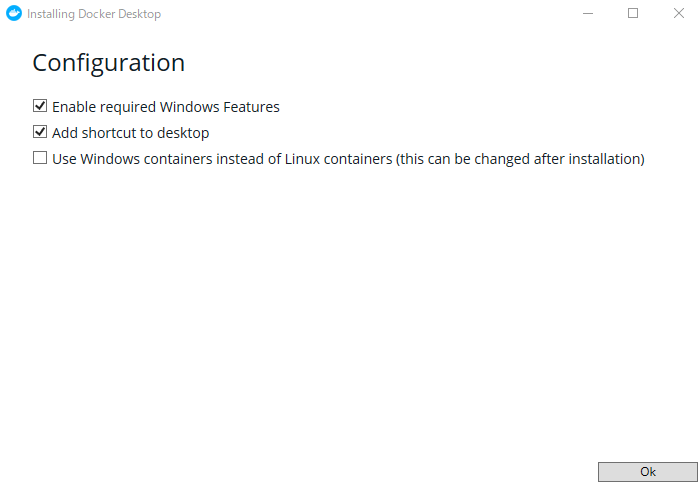
ここからダウンロード
hello-world
>docker run hello-world
Unable to find image 'hello-world:latest' locally
latest: Pulling from library/hello-world
1b930d010525: Pull complete
Digest: sha256:fc6a51919cfeb2e6763f62b6d9e8815acbf7cd2e476ea353743570610737b752
Status: Downloaded newer image for hello-world:latest

Hello from Docker!
This message shows that your installation appears to be working correctly.

To generate this message, Docker took the following steps:
 1. The Docker client contacted the Docker daemon.
 2. The Docker daemon pulled the "hello-world" image from the Docker Hub.
    (amd64)
 3. The Docker daemon created a new container from that image which runs the
    executable that produces the output you are currently reading.
 4. The Docker daemon streamed that output to the Docker client, which sent it
    to your terminal.

To try something more ambitious, you can run an Ubuntu container with:
 $ docker run -it ubuntu bash

Share images, automate workflows, and more with a free Docker ID:
 https://hub.docker.com/

For more examples and ideas, visit:
 https://docs.docker.com/get-started/


>
nginx
> docker run --name nginx1 -d -p 8080:80 nginx
↓
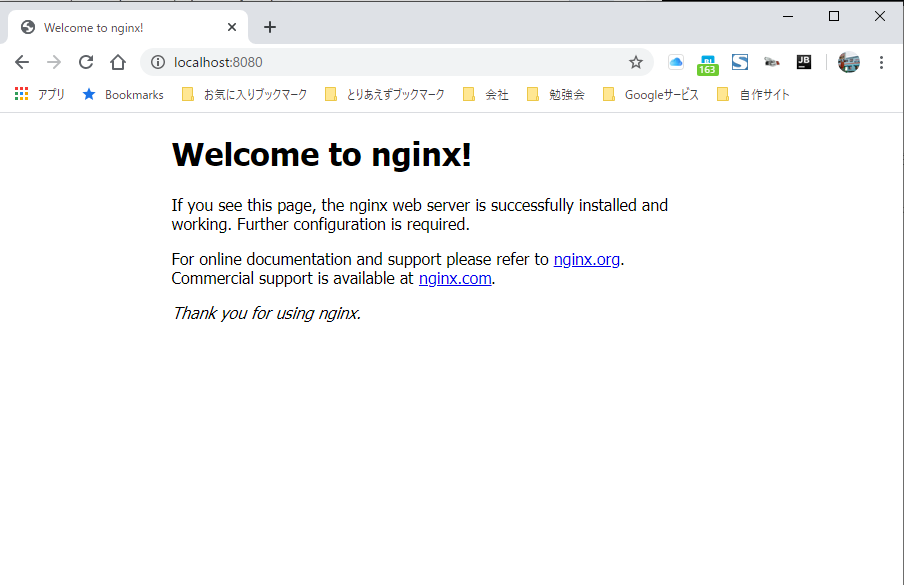
こんな感じかな
所感
Docker ToolBoxと異なるのは別IPでDockerを制御することはないのでlocalhost:xxxxといった感じで扱えることや
設定回りがやりやすくなった点
問題点としてはVirtualBoxと併用できなかったり、Hyper-Vがないと動かせない点とかですかね…
Homeで動かせたらよかったのですが、できなかったのでアップグレードするはめになりました…
自己CA認証局を作成して、SSLページを表示する
CAとかわからないけど
ネットで検索していくつか出たものを参考に作成してみた
参考情報
オレだよオレオレ認証局で証明書つくる - Qiita
CentOS7:SSL自己発行局の設置から俺々証明書の作成と承認まで
オレオレ認証局クライアント証明書の作り方(sha256) - Qiita
準備
opensslの設定ファイルをコピー
mkdir -p /etc/pki/caCrt
cp -p /etc/pki/tls/openssl.cnf /etc/pki/caCrt/.
cp -p /etc/pki/tls/openssl.cnf /etc/pki/caCrt/openssl-ca.cnf
cp -p /etc/pki/tls/openssl.cnf /etc/pki/caCrt/openssl-server.cnf
cp -p /etc/pki/tls/openssl.cnf /etc/pki/caCrt/openssl-client.cnf
CA用の編集(一部追加)
vi /etc/pki/caCrt/openssl-ca.cnf
----
[ usr_cert ]
basicConstraints=CA:TRUE
nsCertType = client, email
subjectAltName=@alt_names
----
サーバ証明書用の編集(一部追加)
vi /etc/pki/caCrt/openssl-server.cnf
----
[ usr_cert ]
basicConstraints = CA:FALSE
nsCertType =  server
subjectAltName=@alt_names
----
クライアント証明書用の編集(一部追加)
vi /etc/pki/caCrt/openssl-client.cnf
----
[ usr_cert ]
basicConstraints=CA:FALSE
nsCertType =  client, email, objsign
----
DNS設定
vi /etc/pki/caCrt/san.txt
----
subjectAltName=DNS:sample.com,DNS:*.sample.com
----
CA(自己認証局)作成
秘密鍵作成
openssl genrsa \
    -aes256 \
    -out cakey.pem 2048
> Enter pass phrase for cakey.pem: [秘密鍵のパスワード]
> Verifying - Enter pass phrase for cakey.pem: [秘密鍵のパスワード]
CSRファイル生成
openssl req -new \
    -config /etc/pki/caCrt/openssl-ca.cnf \
    -key cakey.pem \
    -out cacert.csr
> Enter pass phrase for cakey.pem: [秘密鍵のパスワード]
> You are about to be asked to enter information that will be incorporated
> into your certificate request.
> What you are about to enter is what is called a Distinguished Name or a DN.
> There are quite a few fields but you can leave some blank
> For some fields there will be a default value,
> If you enter '.', the field will be left blank.
> -----
> Country Name (2 letter code) [XX]:JP  ← なんか適当に
> State or Province Name (full name) []:Fukuoka ← なんか適当に
> Locality Name (eg, city) [Default City]:Fukuoka ← なんか適当に
> Organization Name (eg, company) [Default Company Ltd]:OreOre inc. ← なんか適当に
> Organizational Unit Name (eg, section) []: ← ← なんか適当に
> Common Name (eg, your name or your server's hostname) []:localhost ← なんか適当に
> Email Address []:  ← ブランク
>
> Please enter the following 'extra' attributes
> to be sent with your certificate request
> A challenge password []: ← ブランク
> An optional company name []: ← ブランク
CA証明書作成
openssl x509 \
    -days 3650 \
    -in cacert.csr \
    -req -signkey cakey.pem \
    -out cacert.pem
> Signature ok
> subject=/C=JP/ST=Fukuoka/L=Fukuoka/O=OreOre inc./CN=localhost
> Getting Private key
> Enter pass phrase for cakey.pem: [秘密鍵のパスワード]
認証局管理用のファイルを初期化
touch /etc/pki/CA/index.txt
echo 00 > /etc/pki/CA/serial
サーバ証明書
秘密鍵を作成
openssl genrsa -aes256 -out privkey.pem 2048
> Enter pass phrase for privkey.pem:
> Verifying - Enter pass phrase for privkey.pem:
CSR作成
openssl req \
    -new -key privkey.pem \
    -out domain_name.csr
> Enter pass phrase for privkey.pem: [password]
> You are about to be asked to enter information that will be incorporated
> into your certificate request.
> What you are about to enter is what is called a Distinguished Name or a DN.
> There are quite a few fields but you can leave some blank
> For some fields there will be a default value,
> If you enter '.', the field will be left blank.
> -----
> Country Name (2 letter code) [XX]:JP
> State or Province Name (full name) []:Fukuoka
> Locality Name (eg, city) [Default City]:Fukuoka
> Organization Name (eg, company) [Default Company Ltd]:OreOre inc.
> Organizational Unit Name (eg, section) []:
> Common Name (eg, your name or your server's hostname) []:*.sample.com
> Email Address []:
>
> Please enter the following 'extra' attributes
> to be sent with your certificate request
> A challenge password []:
> An optional company name []:
サーバ証明書作成
openssl ca \
    -config /etc/pki/caCrt/openssl-server.cnf \
    -keyfile cakey.pem -cert cacert.pem \
    -in domain_name.csr \
    -out domain_name.crt.pem \
    -days 825 \
    -extfile /etc/pki/caCrt/san.txt
> Using configuration from /etc/pki/tls/openssl.cnf
> Enter pass phrase for cakey.pem:
> Check that the request matches the signature
> Signature ok
> Certificate Details:
>         Serial Number: 1 (0x1)
>         Validity
>             Not Before: Feb 15 04:46:21 2020 GMT
>             Not After : May 20 04:46:21 2022 GMT
・
・
・
なんかいろいろでる
クライアント証明書
秘密鍵を作成
openssl genrsa \
    -aes256 \
    -out client-privatekey.pem 2048
> Enter pass phrase for client-privatekey.pem:
> Verifying - Enter pass phrase for client-privatekey.pem:
CSR発行
openssl req \
    -new \
    -key client-privatekey.pem \
    -out client.csr
> Enter pass phrase for client-privatekey.pem:
> You are about to be asked to enter information that will be incorporated
> into your certificate request.
> What you are about to enter is what is called a Distinguished Name or a DN.
> There are quite a few fields but you can leave some blank
> For some fields there will be a default value,
> If you enter '.', the field will be left blank.
> -----
> Country Name (2 letter code) [XX]:JP
> State or Province Name (full name) []:Fukuoka
> Locality Name (eg, city) [Default City]:Fukuoka
> Organization Name (eg, company) [Default Company Ltd]:OreOre inc.
> Organizational Unit Name (eg, section) []:
> Common Name (eg, your name or your server's hostname) []:OreOre client
> Email Address []:
>
> Please enter the following 'extra' attributes
> to be sent with your certificate request
> A challenge password []:
> An optional company name []:
クライアント証明書作成
openssl ca \
    -config /etc/pki/caCrt/openssl-client.cnf \
    -cert cacert.pem \
    -keyfile cakey.pem \
    -out clientcert.crt \
    -infiles client.csr
> Using configuration from /etc/pki/caCrt/openssl-client.cnf
> Enter pass phrase for cakey.pem:
> Check that the request matches the signature
> Signature ok
> Certificate Details:
>         Serial Number: 2 (0x2)
>         Validity
>             Not Before: Feb 15 05:08:00 2020 GMT
>             Not After : Feb 14 05:08:00 2021 GMT
>         Subject:
・
・
なんかいろいろでる
クライアント証明書をpkcs12でエクスポート
openssl pkcs12 \
    -export \
    -in clientcert.crt \
    -inkey client-privatekey.pem \
    -out clientcertinbrowser.pfx -name "hogehoge"
> Enter pass phrase for client-privatekey.pem: [password]
> Enter Export Password: [ブランク]
> Verifying - Enter Export Password: [ブランク]
nginx設定
初期設定のものを書き換え
vi /etc/nginx/conf.d/default.conf
----
ssl_protocols TLSv1 TLSv1.1 TLSv1.2;
server {
    listen       443;
    server_name  dev.sample.com;

    ssl on;
    ssl_certificate /vagrant/domain_name.crt.pem;
    ssl_certificate_key /vagrant/privkey-nopass.pem;

    #charset koi8-r;
    #access_log  /var/log/nginx/host.access.log  main;

    location / {
        root   /usr/share/nginx/html;
        index  index.html index.htm;
    }
}
----
↓
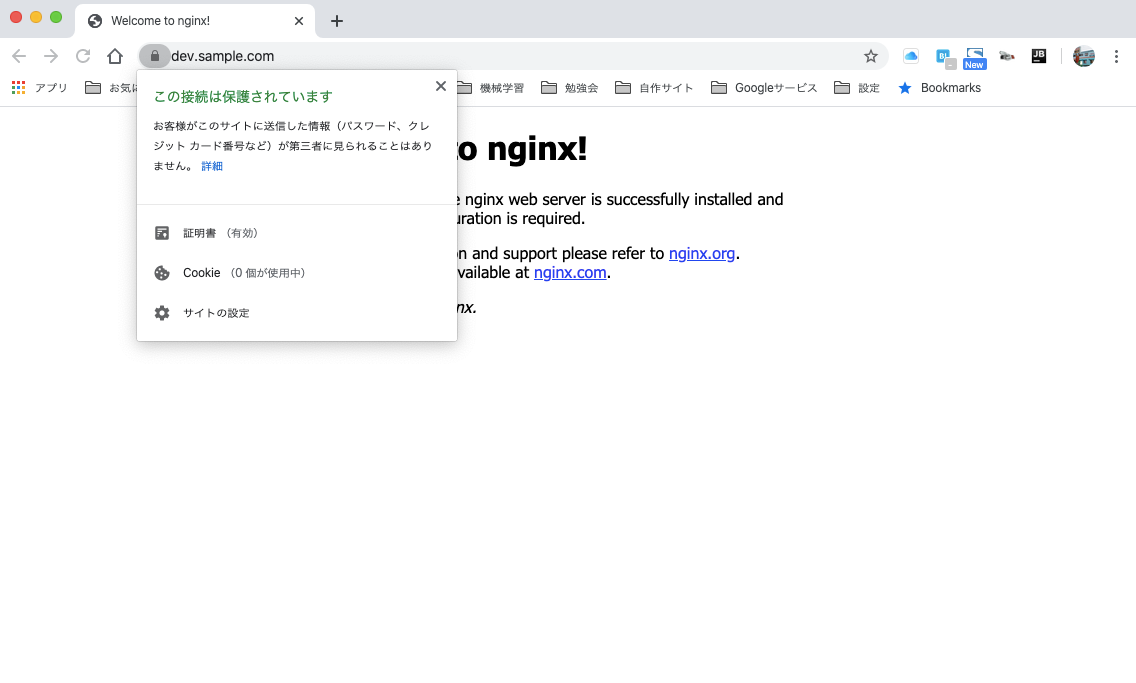
まあ、これでよいかな・・・
■追記
webブラウザで証明書のインポートが別途必要
参考情報
オレだよオレオレ認証局で証明書つくる - Qiita
CentOS7:SSL自己発行局の設置から俺々証明書の作成と承認まで
オレオレ認証局クライアント証明書の作り方(sha256) - Qiita
ありがとうございましたm(_ _)m
Rustのhelloworldを試す。
インストール
curl https://sh.rustup.rs -sSf | sh
環境設定
source $HOME/.cargo/env
でOK
確認
$ rustc --version
rustc 1.37.0 (eae3437df 2019-08-13)
まずはHelo worldのみ
main.rs
fn main() {
    println!("hello, world");
}
ついでに超簡単なfizzbuzzも
fn main() {
    for num in 1..51 {
        let mut _str = "";
        if num % 3 == 0 && num % 5 != 0{
            _str = "fizz";
        } else if num % 3 != 0 && num % 5 == 0 {
            _str = "buzz";
        } else if num % 3 == 0 && num % 5 == 0{
            _str = "fizzbuzz"
        }

        println!("{}:{}", num, _str);
    }
}
所感
まだ、触ったばかりでわからない状況
メモリ管理もいろいろできるみたいだし、文法の学習をしながら他の言語との比較を行っていく
javascriptのPromiseとasync / awaitについて少し試す
Promiseは
並列処理でちょっと前に学習したやつで
function sampleTask1() {
    return new Promise(function(resolve, reject) {
        setTimeout(function () {
            console.log('sample1');
            resolve("sample1");
        }, 3000);
    });
}
って定義したら
↓
sampleTask1()
    .then(function(result) {
        console.log("result", result);
    })
    .catch(function(error) {
        console.log("error");
    });
で実行した際に非同期で動作して、正常時にはresolve、異常時にはrejectで返却するやつです。
今回は?
async / awaitがある
これは
非同期処理をもう少しスッキリ書けるらしい
まずは今までのやつ
console.log("start");
Promise.resolve()
    .then(function() {
        return new Promise(function(resolve, reject) {
            setTimeout(function() {
                console.log("sample2-1");
                resolve("sample2-1");
            }, 16);
        });
    })
    .then(function(result) {
        console.log("result", result);
    })
    .then(function() {
        return new Promise(function(resolve, reject) {
            setTimeout(function() {
                console.log("sample2-2");
                resolve("sample2-2");
            }, 10);
        })
    })
    .then(function(result) {
        console.log("result", result);
    })
    .then(function() {
        return new Promise(function(resolve, reject) {
            setTimeout(function() {
                console.log("sample2-3");
                resolve("sample2-3");
            }, 5);
        });
    })
    .then(function(result) {
        console.log("result", result);
    });
console.log("end");
これが
↓
// まず、Promiseを返す関数を定義
function taskA() {
    return new Promise(function(resolve, reject) {
        setTimeout(function() {
            console.log("sample2-1");
            resolve("sample2-1");
        }, 16);
    })
}
function taskB() {
    return new Promise(function(resolve, reject) {
        setTimeout(function() {
            console.log("sample2-2");
            resolve("sample2-2");
        }, 25);
    })
}
function taskC() {
    return new Promise(function(resolve, reject) {
        setTimeout(function() {
            console.log("sample2-3");
            resolve("sample2-3");
        }, 5);
    })
}

// 逐次処理を行うやつ
async function taskSample1() {
    // 1つずつ実行
    const res1 = await taskA();
    console.log("res1:", res1);
    const res2 = await taskB();
    console.log("res2:", res2);
    const res3 = await taskC();
    console.log("res3;", res3);

    // 配列に設定して順次実行
    const taskList = [
        taskA, taskB, taskC
    ];
    for (let i=0;i<taskList.length;i++) {
        const res = await taskList[i]();
        console.log(`res${i}=`, res);
    }
}

// 実行
console.log("start");
taskSample1();
console.log("end");
こうなる
「async」を定義した関数はPromiseを返すようになるらしい、
また「await」は処理結果を返すまで待機してくれるとのこと
基本的には両方セットで使うみたい。
fetchを使う場合は
async function getRequest() {
    const response = await fetch("http://127.0.0.1:8080/sample_api1", {
        method: "POST", // *GET, POST, PUT, DELETE, etc.
        mode: "cors", // no-cors, cors, *same-origin
        cache: "no-cache", // *default, no-cache, reload, force-cache, only-if-cached
        credentials: "same-origin", // include, same-origin, *omit
        headers: {
            "Content-Type": "application/json; charset=utf-8"
        },
        redirect: "follow", // manual, *follow, error
        referrer: "no-referrer", // no-referrer, *client
        //body: JSON.stringify("{}"), // 本文のデータ型は "Content-Type" ヘッダーと一致する必要があります
    });

    const data = await response.json();
    console.log(data);
}

console.log("start");
for (let i=0;i<5;i++) {
    getRequest();
}
console.log("end");
うん、なんとなく同期処理っぽくかけるのが良い感じですね(^o^)
今回は記載しませんがPromise.allで複数の並列処理後の結果を取得してごにょごにょとかいうのもやってみよう
所感
結構スッキリかけるようになったようになっています。
ただ、Promiseの仕組みを十分に理解することやエラーの箇所の記載がないようにエラーに関する挙動をどうするかを今後検討していきたい。
javascriptのfetchを使ってAPIより結果を取得
概要
fetch使ってみたい
APIはgo言語で作成した適当なやつ
サーバ側
package main

import (
	"encoding/json"
	"log"
	"math/rand"
	"net/http"
	"time"
)

func main() {
	http.HandleFunc("/sample_api1", sampleAPI1)
	http.HandleFunc("/sample_api2", sampleAPI2)
	http.HandleFunc("/sample_api3", sampleAPI3)
	http.ListenAndServe("127.0.0.1:8080", nil)
}

// Response ...
type Response struct {
	Status int    `json:"status"`
	Rssult string `json:"result"`
}

func sampleAPI1(w http.ResponseWriter, r *http.Request) {

	//if r.Method == http.MethodOptions {
	//	return
	//}
	log.Println("api1", r.Method)
	rand.Seed(time.Now().UnixNano())
	time.Sleep(time.Duration(int(rand.Intn(5))) * time.Second)
	response := Response{http.StatusOK, "ok1"}
	res, _ := json.Marshal(response)

	r.Close = true
	defer r.Body.Close()
	w.Header().Set("Access-Control-Allow-Origin", "*")
	w.Header().Set("Access-Control-Allow-Headers", "*")
	w.Header().Set("Accept", "application/json")
	w.Header().Set("Content-Type", "application/json")
	w.Write(res)

}
func sampleAPI2(w http.ResponseWriter, r *http.Request) {

	//if r.Method == http.MethodOptions {
	//	return
	//}
	log.Println("api2", r.Method)

	rand.Seed(time.Now().UnixNano())
	time.Sleep(time.Duration(int(rand.Intn(5))) * time.Second)
	response := Response{http.StatusOK, "ok2"}
	res, _ := json.Marshal(response)

	w.Header().Set("Access-Control-Allow-Origin", "*")
	w.Header().Set("Access-Control-Allow-Headers", "*")
	w.Header().Set("Content-Type", "application/json")
	w.Write(res)
}
func sampleAPI3(w http.ResponseWriter, r *http.Request) {

	//if r.Method == http.MethodOptions {
	//	return
	//}
	log.Println("api3", r.Method)

	rand.Seed(time.Now().UnixNano())
	time.Sleep(time.Duration(int(rand.Intn(5))) * time.Second)
	response := Response{http.StatusOK, "ok3"}
	res, _ := json.Marshal(response)

	w.Header().Set("Access-Control-Allow-Origin", "*")
	w.Header().Set("Access-Control-Allow-Headers", "*")
	w.Header().Set("Content-Type", "application/json")
	w.Write(res)
}
やって置かないとポートが違うとかなんとかでCORSエラーで弾かれる
javascript(Promise.all)
unction taskA() {

    return fetch("http://127.0.0.1:8080/sample_api1", {
        method: "GET", // *GET, POST, PUT, DELETE, etc.
        mode: "cors", // no-cors, cors, *same-origin
        cache: "no-cache", // *default, no-cache, reload, force-cache, only-if-cached
        credentials: "same-origin", // include, same-origin, *omit
        headers: {
            "Content-Type": "application/json; charset=utf-8",
        },
        redirect: "manual", // manual, *follow, error
        referrer: "no-referrer", // no-referrer, *client
        //body: JSON.stringify("{}"), // 本文のデータ型は "Content-Type" ヘッダーと一致する必要があります
    })
    .then(function(response) {
        console.log("taskA");
        return response.json();
    });


}
function taskB()  {

   return fetch("http://127.0.0.1:8080/sample_api2", {
        method: "GET", // *GET, POST, PUT, DELETE, etc.
        mode: "cors", // no-cors, cors, *same-origin
        cache: "no-cache", // *default, no-cache, reload, force-cache, only-if-cached
        credentials: "same-origin", // include, same-origin, *omit
        headers: {
            "Content-Type": "application/json; charset=utf-8",
        },
        redirect: "manual", // manual, *follow, error
        referrer: "no-referrer", // no-referrer, *client
        //body: JSON.stringify("{}"), // 本文のデータ型は "Content-Type" ヘッダーと一致する必要があります
    })
    .then(function(response) {
        console.log("taskB");
        return response.json();
    });

}
function taskC()  {

   return fetch("http://127.0.0.1:8080/sample_api3", {
        method: "GET", // *GET, POST, PUT, DELETE, etc.
        mode: "cors", // no-cors, cors, *same-origin
        cache: "no-cache", // *default, no-cache, reload, force-cache, only-if-cached
        credentials: "same-origin", // include, same-origin, *omit
        headers: {
            "Content-Type": "application/json; charset=utf-8",
        },
        redirect: "manual", // manual, *follow, error
        referrer: "no-referrer", // no-referrer, *client
        //body: JSON.stringify("{}"), // 本文のデータ型は "Content-Type" ヘッダーと一致する必要があります
    })
    .then(function(response) {
        console.log("taskC");
        return response.json();
    });

}

// 並列ですべて完了後にレスポンスを返却
console.log("start");
Promise.all([
    taskA(), taskB(), taskC()
]).then(function(data) {
    console.log("result start");
    console.log(data);
    console.log("result end");
});
console.log("end");
↓
start
end
taskB
taskC
taskA
result start
(3) [{…}, {…}, {…}]0: {status: 200, result: "ok1"}1: {status: 200, result: "ok2"}2: {status: 200, result: "ok3"}length: 3__proto__: Array(0)
result end
※逐次処理も同じ感じで対応できそう
所感
今までajaxのcallbackでやってた部分が多いため、Promiseに対応していかないといけないが
ちょっと仕組みが難しく感じる
少しずつ確認して理解していくしかない…
javascriptのPromiseとかいうのを今更少しだけ学習する
Promise
非同期処理するやつ
Promiseで実行した結果はresolveが正常時、rejectが異常時に設定しないと取得できないらしい
サンプル
1つの処理についての非同期処理
unction sampleTask1() {
    return new Promise(function(resolve, reject) {
        setTimeout(function () {
            console.log('sample1');
            resolve("sample1");
        }, 3000);
    });
}

console.log("start");

sampleTask1()
    .then(function(result) {
        console.log("result", result);
    })
    .catch(function(error) {
        console.log("error");
    });

console.log("end");
↓
start
end
sample1
result sample1
※単純に「new Promise」のオブジェクトより結果を判定する
複数の処理を非同期内で逐次処理で行う
console.log("start");
Promise.resolve()
    .then(function() {
        return new Promise(function(resolve, reject) {
            setTimeout(function() {
                console.log("sample2-1");
                resolve("sample2-1");
            }, 16);
        });
    })
    .then(function(result) {
        console.log("result", result);
    })
    .then(function() {
        return new Promise(function(resolve, reject) {
            setTimeout(function() {
                console.log("sample2-2");
                resolve("sample2-2");
            }, 10);
        })
    })
    .then(function(result) {
        console.log("result", result);
    })
    .then(function() {
        return new Promise(function(resolve, reject) {
            setTimeout(function() {
                console.log("sample2-3");
                resolve("sample2-3");
            }, 5);
        });
    })
    .then(function(result) {
        console.log("result", result);
    });
console.log("end");
↓
start
end
sample2-1
result sample2-1
sample2-2
result sample2-2
sample2-3
result sample2-3
順番に処理を行うため、1つ前の実行結果を次の処理で取得するようになっていて、最後に一括で取得などを行いたい場合は少し工夫する必要がある。
複数の処理を実行し、全ての処理が完了後に結果を取得
console.log("start");
Promise.all([

     new Promise(function(resolve, reject) {
            setTimeout(function() {
                console.log("sample2-1");
                resolve("sample2-1");
            }, 16);
        })
    , new Promise(function(resolve, reject) {
            setTimeout(function() {
                console.log("sample2-2");
                resolve("sample2-2");
            }, 10);
        })
    ,  new Promise(function(resolve, reject) {
            setTimeout(function() {
                console.log("sample2-3");
                resolve("sample2-3");
            }, 25);
        })

]).then(function(data) {
    console.log("result start");
    console.log(data);
    console.log("result end");
});
console.log("end");
|<
↓
>||
start
end
sample2-2
sample2-1
sample2-3
result start
 (3) ["sample2-1", "sample2-2", "sample2-3"]0: "sample2-1"1: "sample2-2"2: "sample2-3"length: 3__proto__: Array(0)
result end
すべての処理が並列で動作し、最後に処理を実行するため、最後に取得するまでは値を取得できない
まあ、なんか方法はあるとは思うが…
所感
allによる同時並列と逐次処理で次の処理へ流せるのは少しだけ理解した
次はfetchを利用した手法で見てみる
golangのpanic発生しても処理を続行したい
golangでのエラーとかって
基本的にはエラーオブジェクトのチェックしかしていない
panic発生したら
落ちます
package main

import (
    "log"
)

func main() {
    log.Println("start")


    // 意図的にpanicを起こす
    panic("aaaa")
    //var a *interface{}
    //*a = 0
    //x := 10
    //y := 0
    //b := x / y
    //log.Println(b)

    log.Println("end")
}
↓
2019/08/14 10:04:05 start
panic: aaaa

goroutine 1 [running]:
main.main()
	/sample2-b.go:12 +0x79
exit status 2
そうならないようにerrオブジェクトや変数のチェックで抑制していますが
まれになんらかの理由でオブジェクトにnullが挿入される自体が発生してpanicがおきたらマズい
javaのtry-catchとかあればよいがそういうのはないため、
deferとrecoverを併用することで対応できるとのこと
ドキュメントより以下、引用(http://golang.jp/effective_go#recover)
panicが呼び出されたとき(これには、配列のインデックスが範囲外であるときや、型アサーションに失敗したような暗黙的なものも含む)は、すぐさま、カレントの関数を停止し、ゴルーチンのスタックの巻き戻しを開始します。その途中、遅延指定されている関数をすべて実行します。この巻き戻しがゴルーチンのスタックの先頭にたどり着くと、プログラムは終了します。ただし、組み込み関数recoverを使うことで、ゴルーチンの制御を取り戻し、通常の実行を再開させることが可能です。
書き直し
package main

import (
	"log"
	"fmt"
	"runtime"
)

func main() {
	log.Println("start")

	// 今回は即時関数にしているがerrorの戻り値を取得できるならなんでもよい
	err := func() (errRes error) {
		// panic発生時に補足するやつ
		defer func() {
			if err := recover(); err != nil {
				// エラー情報を戻り値のerrResへ設定
				errRes = fmt.Errorf("error: %s", err)

				// stack trace
				for i:=0;;i++ {
					_, file, line, ok := runtime.Caller(i)
					if ok == false {
						break
					}
					log.Printf("depth: %d, line: %4d, file:%v\n", i, line, file)
				}
			}
		}()

		// 意図的にpanicを起こす
		//panic("aaaa")
		//var a *interface{}
		//*a = 0
		x := 10
		y := 0
		b := x / y
		log.Println(b)

		// ここまできたら正常
		return nil
	}()

	// errorチェック
	if err != nil {
		log.Println(err)
	}

	log.Println("end")
}
↓
2019/08/14 10:13:38 start
2019/08/14 10:13:38 depth: 0, line:   22, file: /work/golang/sample2.go
2019/08/14 10:13:38 depth: 1, line:  522, file:/usr/local/Cellar/go/1.12.7/libexec/src/runtime/panic.go
2019/08/14 10:13:38 depth: 2, line:   61, file:/usr/local/Cellar/go/1.12.7/libexec/src/runtime/panic.go
2019/08/14 10:13:38 depth: 3, line:   37, file:/work/golang/sample2.go
2019/08/14 10:13:38 depth: 4, line:   42, file:/work/golang/sample2.go
2019/08/14 10:13:38 depth: 5, line:  200, file:/usr/local/Cellar/go/1.12.7/libexec/src/runtime/proc.go
2019/08/14 10:13:38 depth: 6, line: 1337, file:/usr/local/Cellar/go/1.12.7/libexec/src/runtime/asm_amd64.s
2019/08/14 10:13:38 error: runtime error: integer divide by zero
2019/08/14 10:13:38 end
Webフレームワークとかは
API配下のpanicは拾ってくれるが、内部でgoroutineなどを任意で定義した場合にpanicを起こすと
Webフレームワークのアプリ自体が停止する可能性がある・・・
参考
Go言語のエラーハンドリングについて ~panic編~ - Qiita
golangでrecoverしたときの戻り値 - Qiita
http://golang.jp/effective_go#recover
golangでpanicをrecoverしたときにスタックトレースを表示する - code.alone
所感
なんかスマートじゃない感じ…
現状、これしか見つからないからこの方法で対応を試みます。
