Xcode26でAIアシスト機能があるらしいのでほんのちょっとだけ試した(本当にちょっとだけ)
簡単に作ったやつ

うーん、どこかのゲームセンターで見たものとなんか似ているかもしれんけど許して🙏
環境
たぶん、これらがないと動作しない
Xcodeの設定
「Xcode」> 「Settings」>「Intelligense」で指定可能
「Intelligense」が存在しない場合はOSなどのバージョンがあっていないので使えないことになるはず・・・

ChatGPT
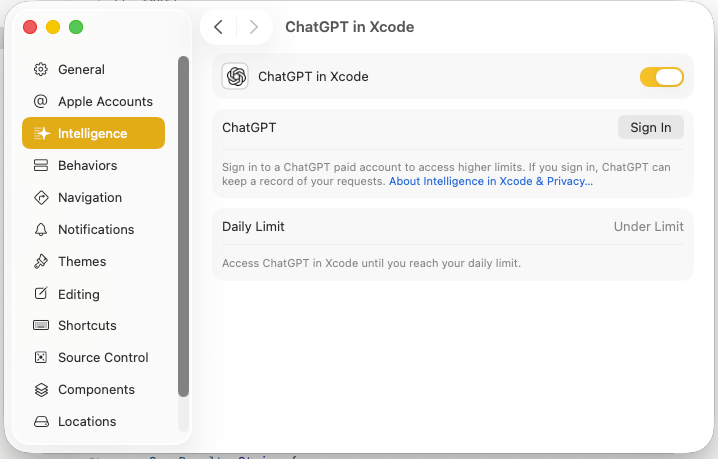
Claude Code

その他
外部のAPIキーを利用したりローカルに存在する場合はローカルのモデルを使うことも可能と思われる

AIの指示
これを選択する

↓

指示したらアプリの作成してくれる
- 一度チャット欄をクリアしたら前のデータがわからなくなる恐れあり
- Xcodeで作成したプロジェクトがある場合はその状態を最初に読み込ませて理解しておく必要がある
所感
楽と言えば楽になる 最初、コードでなんかやりたいとかあった場合にやり方とか全くわからないとかコードの意味がわからない場合に利用する人は重宝する ただ、中途半端な状態になる可能性もあるので作成過程でどのような意味があるかなどを理解してから進めておくほうが今後のスキルとしては役に立つかも
AI開発の場合はモデルや設定、設計準備などが今後重要になっていく感じと思いましたけど 進化しすぎてちょっと怖いとも思ってしまった・・・
iOSのユニバーサルリンクをサンプルアプリで試す
ユニバーサルリンク
まー、超ざっくりいうとQRコードやメモアプリのURLリンクをタップすると対応しているアプリが起動する
必要なもの
XCodeでアプリを作成
今回はSwiftUIで作成したため、以下のファイルを編集
ContentView.swift
//
//  ContentView.swift
//  UnivasalLinkSampleApp
//

import SwiftUI

struct ContentView: View {
    @EnvironmentObject var linkManager: UniversalLinkManager

    var body: some View {
        ScrollView {
            VStack(spacing: 20) {
                Image(systemName: "globe")
                    .imageScale(.large)
                    .foregroundStyle(.tint)

                Text("Hello, world!")

                // Universal Link情報表示
                if linkManager.lastReceivedURL != nil {
                    universalLinkInfo
                } else {
                    Text("Universal Linkはまだ受信していません")
                        .foregroundColor(.gray)
                        .font(.caption)
                }

                // デバッグ用セクション(開発時のみ表示)
                #if DEBUG
                debugSection
                #endif
            }
            .padding()
        }
    }

    // Universal Link情報を表示するView
    var universalLinkInfo: some View {
        VStack(alignment: .leading, spacing: 10) {
            Text("Universal Link受信情報 ✅")
                .font(.headline)
                .foregroundColor(.blue)

            VStack(alignment: .leading, spacing: 5) {
                Text("受信回数: \(linkManager.linkCount)")
                    .font(.subheadline)

                if let url = linkManager.lastReceivedURL {
                    VStack(alignment: .leading, spacing: 2) {
                        Text("URL:")
                            .font(.caption)
                            .fontWeight(.semibold)
                        Text(url.absoluteString)
                            .font(.caption)
                            .foregroundColor(.secondary)
                    }

                    if !url.path.isEmpty {
                        VStack(alignment: .leading, spacing: 2) {
                            Text("Path:")
                                .font(.caption)
                                .fontWeight(.semibold)
                            Text(url.path)
                                .font(.caption)
                                .foregroundColor(.secondary)
                        }
                    }

                    if let query = url.query {
                        VStack(alignment: .leading, spacing: 2) {
                            Text("Query:")
                                .font(.caption)
                                .fontWeight(.semibold)
                            Text(query)
                                .font(.caption)
                                .foregroundColor(.secondary)
                        }
                    }
                }

                if let date = linkManager.receivedAt {
                    Text("受信時刻: \(formatDate(date))")
                        .font(.caption)
                        .foregroundColor(.secondary)
                }
            }
            .padding()
            .background(Color.blue.opacity(0.1))
            .cornerRadius(8)
        }
    }

    #if DEBUG
    var debugSection: some View {
        VStack(spacing: 15) {
            Text("🛠️ Debug Tools")
                .font(.headline)

            VStack(spacing: 10) {
                Text("テスト用Universal Links:")
                    .font(.subheadline)
                    .fontWeight(.semibold)

                VStack(spacing: 8) {
                    debugLinkButton(
                        title: "ホームリンク",
                        url: "https://applink.test-hogehoge.link/"
                    )

                    debugLinkButton(
                        title: "アプリリンク",
                        url: "https://applink.test-hogehoge.link/app/test"
                    )

                    debugLinkButton(
                        title: "商品リンク",
                        url: "https://applink.test-hogehoge.link/product/123"
                    )

                    debugLinkButton(
                        title: "パラメータ付きリンク",
                        url: "https://applink.test-hogehoge.link/app/profile?user_id=456"
                    )
                }
            }
            .padding()
            .background(Color.gray.opacity(0.1))
            .cornerRadius(10)

            Button("履歴をクリア") {
                linkManager.clearHistory()
            }
            .foregroundColor(.red)
        }
    }

    func debugLinkButton(title: String, url: String) -> some View {
        Button(action: {
            // クリップボードにコピー
            UIPasteboard.general.string = url

            // 実際にリンクを開く(デバッグ用)
            if let linkURL = URL(string: url) {
                linkManager.handleUniversalLink(url: linkURL)
            }
        }) {
            VStack(alignment: .leading, spacing: 2) {
                Text(title)
                    .font(.caption)
                    .fontWeight(.semibold)
                Text(url)
                    .font(.caption2)
                    .foregroundColor(.secondary)
            }
            .frame(maxWidth: .infinity, alignment: .leading)
            .padding(.vertical, 8)
            .padding(.horizontal, 12)
            .background(Color.blue.opacity(0.1))
            .cornerRadius(6)
        }
        .buttonStyle(PlainButtonStyle())
    }
    #endif

    // 日時フォーマット
    func formatDate(_ date: Date) -> String {
        let formatter = DateFormatter()
        formatter.dateStyle = .short
        formatter.timeStyle = .medium
        return formatter.string(from: date)
    }
}

// UniversalLinkManagerにクリア機能追加
extension UniversalLinkManager {
    func clearHistory() {
        lastReceivedURL = nil
        receivedAt = nil
        linkCount = 0
    }
}

#Preview {
    ContentView()
        .environmentObject(UniversalLinkManager())
}
UnivasalLinkSampleAppApp.swift
//
//  UnivasalLinkSampleAppApp.swift
//  UnivasalLinkSampleApp
//

import SwiftUI

@main
struct UnivasalLinkSampleAppApp: App {
    @StateObject private var linkManager = UniversalLinkManager()

    var body: some Scene {
        WindowGroup {
            ContentView()
                .environmentObject(linkManager)
                .onOpenURL { url in
                    // Universal Link処理
                    print("🔗 Universal Link received: \(url)")
                    linkManager.handleUniversalLink(url: url)
                }
        }
    }
}

// Universal Link管理クラス
class UniversalLinkManager: ObservableObject {
    @Published var lastReceivedURL: URL?
    @Published var receivedAt: Date?
    @Published var linkCount: Int = 0

    func handleUniversalLink(url: URL) {
        // URLの情報を保存
        lastReceivedURL = url
        receivedAt = Date()
        linkCount += 1

        // ログ出力
        print("📱 Universal Link Details:")
        print("   URL: \(url)")
        print("   Host: \(url.host ?? "nil")")
        print("   Path: \(url.path)")
        print("   Query: \(url.query ?? "nil")")
        print("   Count: \(linkCount)")
    }
}
Info.plistにディープリンク用の設定を追加
<?xml version="1.0" encoding="UTF-8"?>
<!DOCTYPE plist PUBLIC "-//Apple//DTD PLIST 1.0//EN" "http://www.apple.com/DTDs/PropertyList-1.0.dtd">
<plist version="1.0">
<dict>
    <key>CFBundleURLTypes</key>
    <array>
        <dict>
            <key>CFBundleURLName</key>
            <string>net.hogehoge.applinksampleapp</string>
            <key>CFBundleURLSchemes</key>
            <array>
                <string>applinksample</string>
            </array>
        </dict>
    </array>
</dict>
</plist>
Webサイトにユニバーサルリンク用のファイルを追加
apple-app-site-association(拡張子なし)
{
  "applinks": {
    "apps": [],
    "details": [
      {
        "appID": "自分のチームID.net.hogehoge.applinksampleapp",
        "paths": [
          "/app/*",
          "/product/*",
          "*"
        ]
      }
    ]
  }
}
ここに配置
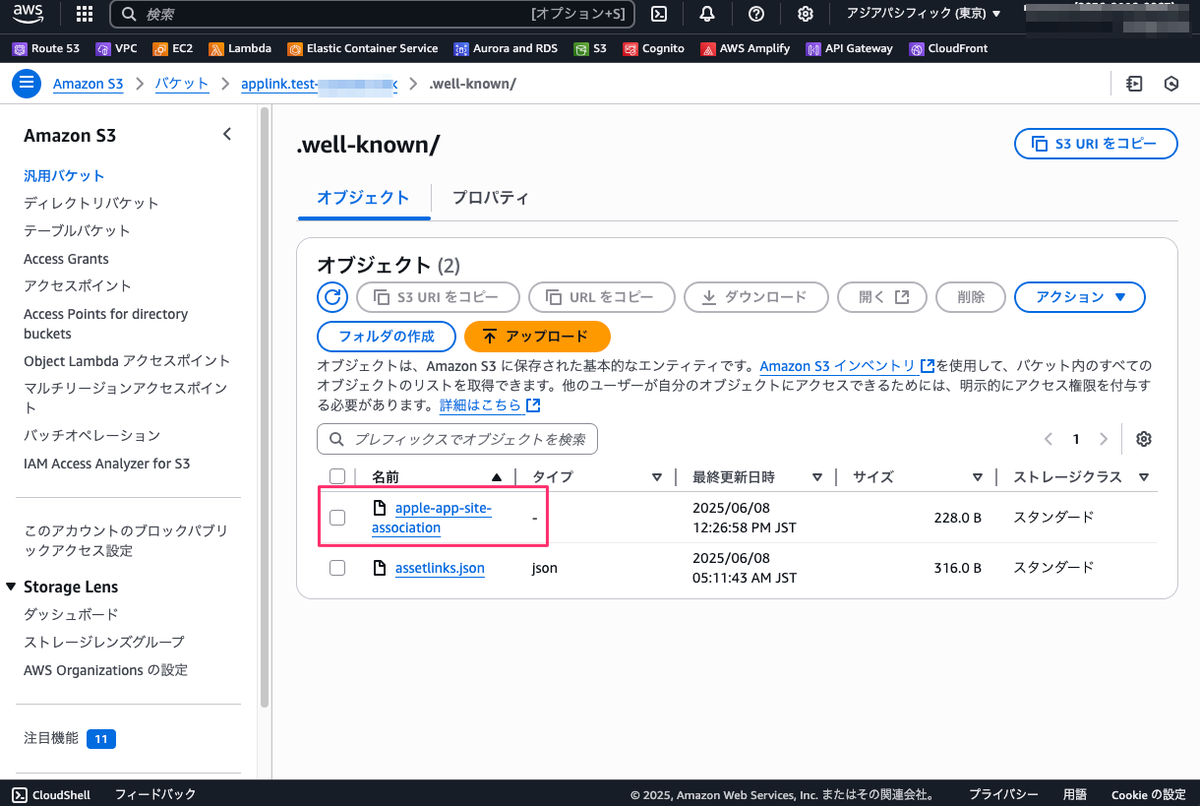
確認
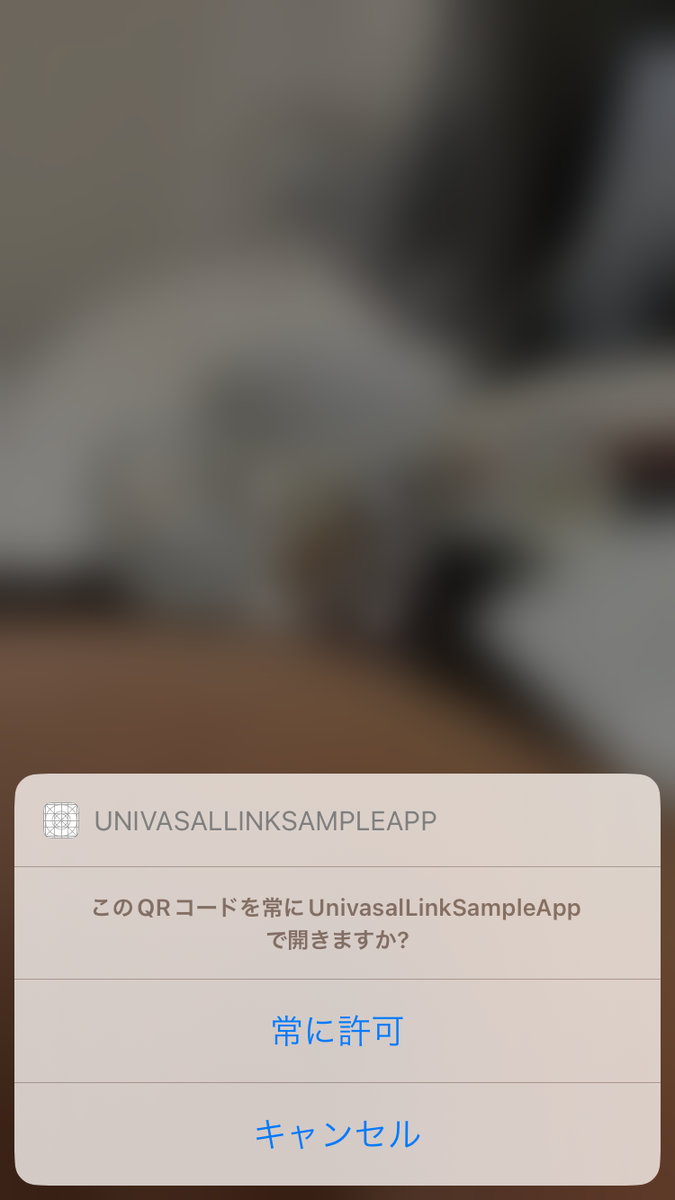 ↓
↓
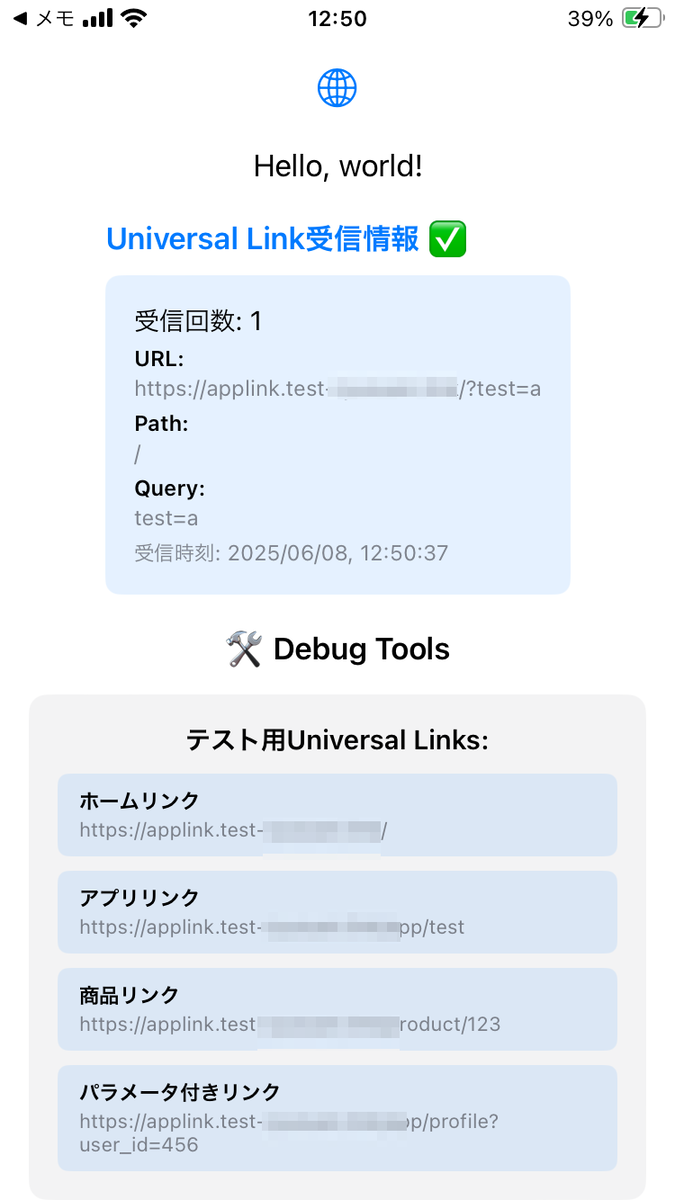
こんな感じ
AndroidのApplink機能でQRコードからアプリを起動してみる
Android アプリリンクの処理
↓

必要なもの
- ドメイン
- AndroidアプリにApplinksの設定
- Webサイトに
.well-known/assetlinks.jsonを配置 - Android Studio
1. テスト用アプリを作成
シンプルなアプリを作成
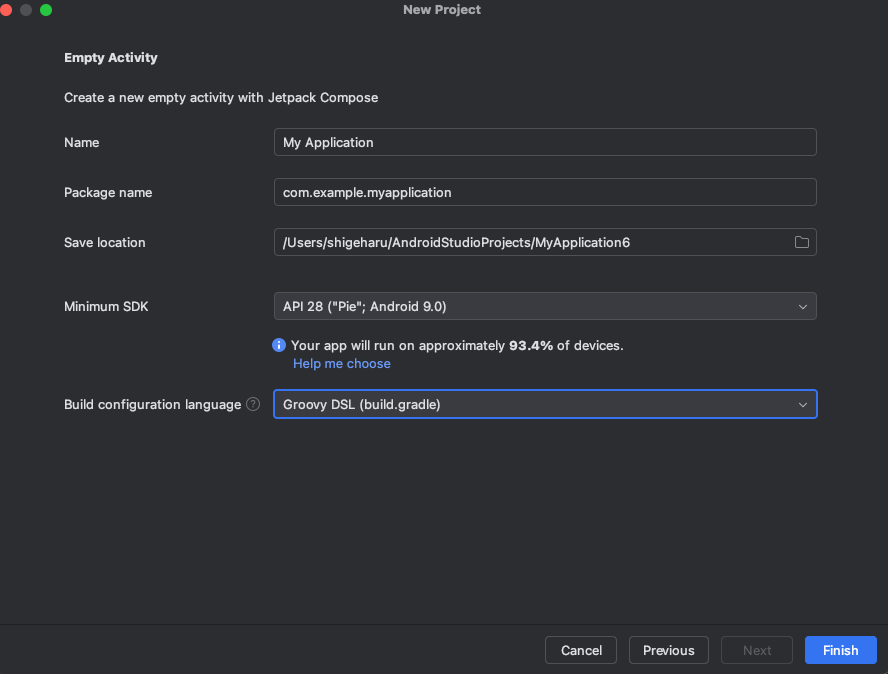
packageなどは各自で変更する
app/build.gradle
android {
    namespace 'net.hogehoge.applinksampleapp'
    compileSdk 35

    defaultConfig {
        applicationId "net.hogehoge.applinksampleapp"
        minSdk 28
        targetSdk 35
        versionCode 1
        versionName "1.0"

        testInstrumentationRunner "androidx.test.runner.AndroidJUnitRunner"
    }

    buildTypes {
        release {
            minifyEnabled false
            proguardFiles getDefaultProguardFile('proguard-android-optimize.txt'), 'proguard-rules.pro'
        }
    }
    compileOptions {
        sourceCompatibility JavaVersion.VERSION_11
        targetCompatibility JavaVersion.VERSION_11
    }
    kotlinOptions {
        jvmTarget = '11'
    }
    buildFeatures {
        compose true
    }
}
AndroidManifest.xmlにApplinksの設定を追加
<?xml version="1.0" encoding="utf-8"?>
<manifest xmlns:android="http://schemas.android.com/apk/res/android"
    xmlns:tools="http://schemas.android.com/tools">

    <application
        android:allowBackup="true"
        android:dataExtractionRules="@xml/data_extraction_rules"
        android:fullBackupContent="@xml/backup_rules"
        android:icon="@mipmap/ic_launcher"
        android:label="@string/app_name"
        android:roundIcon="@mipmap/ic_launcher_round"
        android:supportsRtl="true"
        android:theme="@style/Theme.ApplinkSampleApp"
        tools:targetApi="31">
        <activity
            android:name="net.hogehoge.applinksampleapp.MainActivity"
            android:exported="true"
            android:label="@string/app_name"
            android:theme="@style/Theme.ApplinkSampleApp">
            <intent-filter>
                <action android:name="android.intent.action.MAIN" />

                <category android:name="android.intent.category.LAUNCHER" />
            </intent-filter>

            <!-- App Link用のIntent Filter -->
            <intent-filter android:autoVerify="true">
                <action android:name="android.intent.action.VIEW" />
                <category android:name="android.intent.category.DEFAULT" />
                <category android:name="android.intent.category.BROWSABLE" />
                <data android:scheme="https"
                    android:host="applink.test-hogehoge.link" />
            </intent-filter>
        </activity>
    </application>

</manifest>
フィンガープリントを取得する(セキュリティのため、ダミーデータを添付)
% keytool -list -v -keystore ~/.android/debug.keystore -alias androiddebugkey -storepass android -keypass android | grep -A1 "SHA256"
         SHA256: A5:BD:31:79:75:0D:15:4B:2F:8C:68:72:7F:FB:4A:26:48:8E:75:74:BD:40:F5:FE:E3:8F:2B:D7:89:AF:F1:1A
署名アルゴリズム名: SHA256withRSA
サブジェクト公開キー・アルゴリズム: 2048ビットRSAキー

%
2. Webサイトを作成
ドメインは以下とする
applink.test-hogehoge.link
S3にバケットを作成し、「プロパティ」で静的ホスティングを有効にする
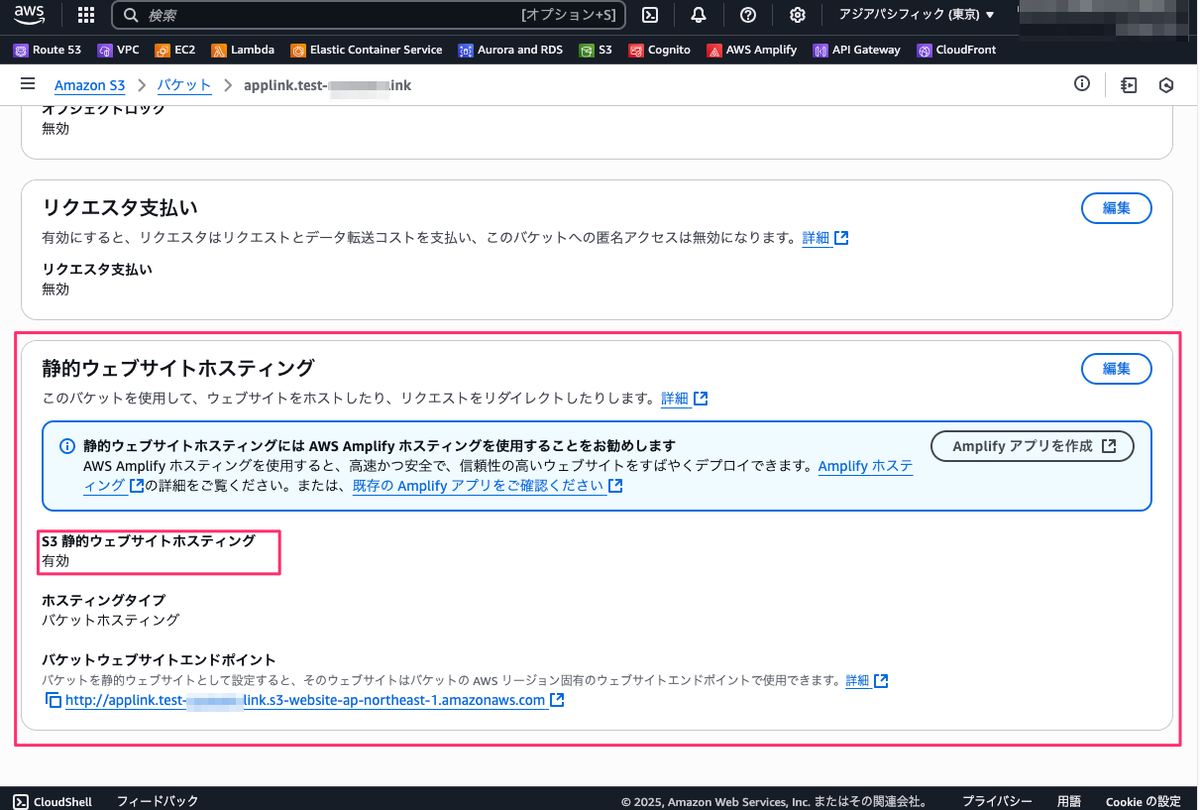
※S3でなくても任意のWebサイトを用意しても良いがhttpsで動作するようにする必要あり
アクセス許可でバケットポリシーを設定
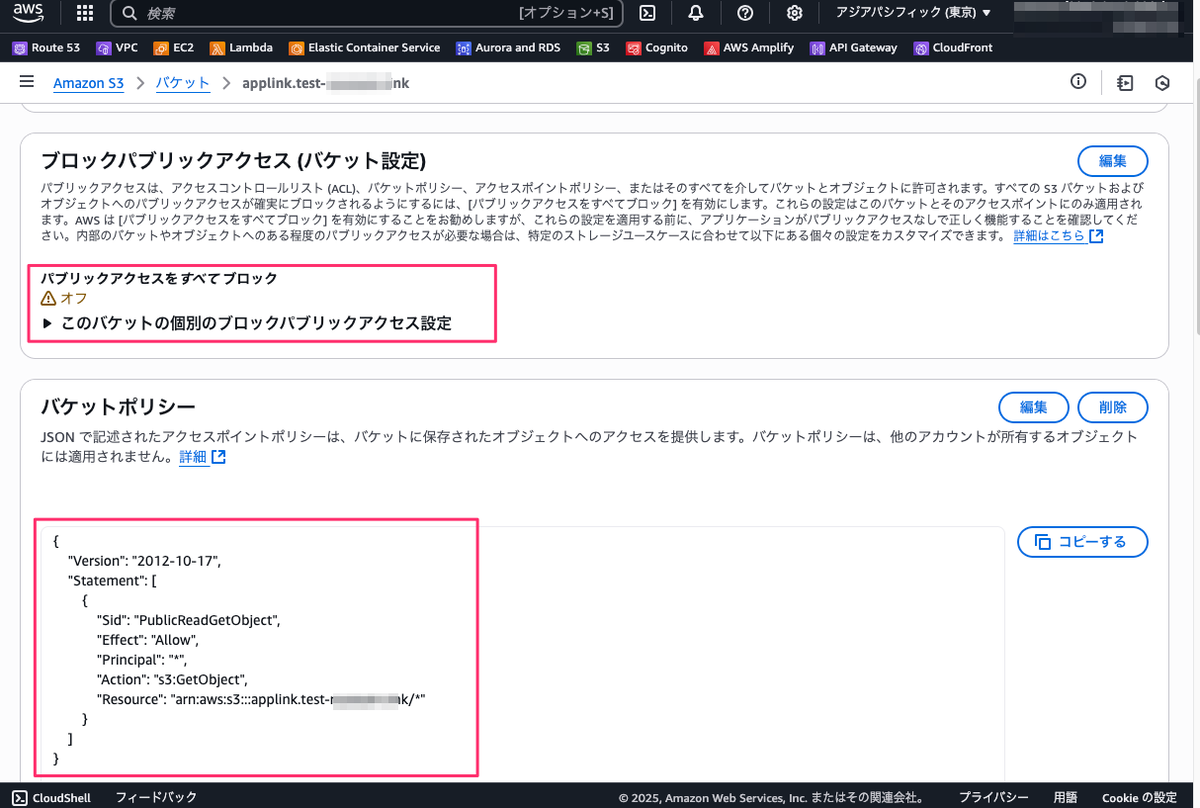
index.htmlを配置
index.html
<!DOCTYPE html>
<html>
<head>
    <title>Test Site</title>
</head>
<body>
    <h1>Hello from applink.test-ryuouen.link!</h1>
</body>
</html>
.well-known/assetlinks.json
[{
  "relation": ["delegate_permission/common.handle_all_urls"],
  "target": {
    "namespace": "android_app",
    "package_name": "net.hogehoge.applinksampleapp",
    "sha256_cert_fingerprints": [
      "A5:BD:31:79:75:0D:15:4B:2F:8C:68:72:7F:FB:4A:26:48:8E:75:74:BD:40:F5:FE:E3:8F:2B:D7:89:AF:F1:1A"
    ]
  }
}]
.well-known/assetlinks.jsonのMIMEを変更する
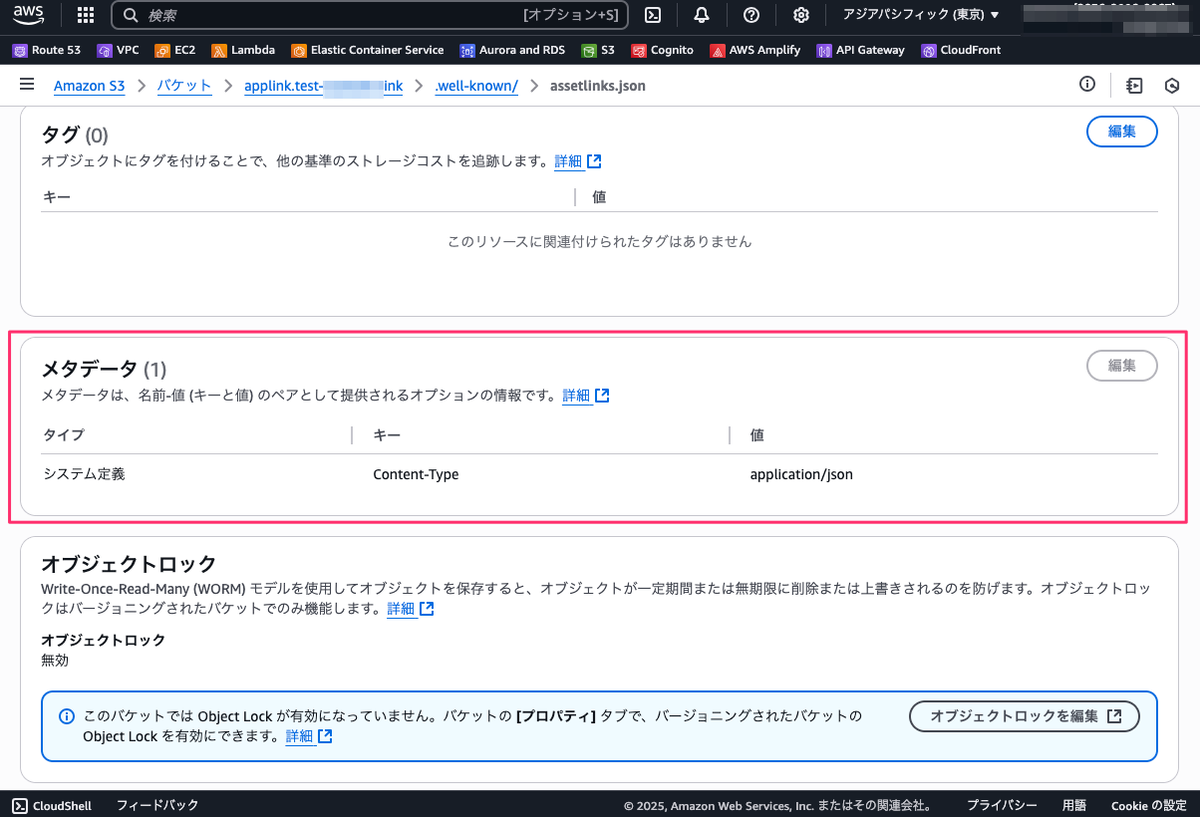 ※アップロード時または「コピー」で再アップロードのようにして上書きすること
ACMで証明書のドメインを検証しておく
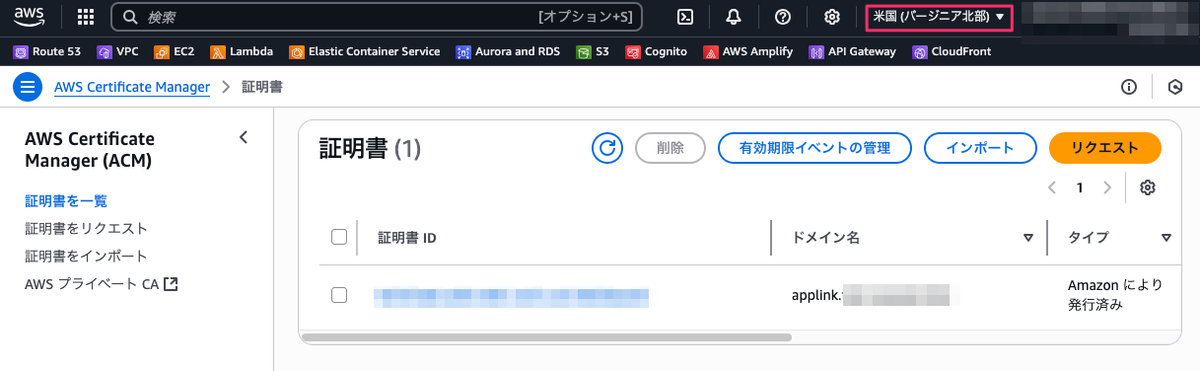 ※リージョンはcloud-frontで利用できるようにバージニア北部にしておくこと
CloudFront設定
概ねの設定は以下

動作確認
Webコンテンツ
curl -I https://applink.test-hogehoge.link/.well-known/assetlinks.json
curl -H "Accept: application/json" https://applink.test-hogehoge.link/.well-known/assetlinks.json
Google Digital Asset Links API確認
curl "https://digitalassetlinks.googleapis.com/v1/statements:list?source.web.site=https://applink.test-hogehoge.link&relation=delegate_permission/common.handle_all_urls"
↓
{
  "statements": [
    {
      "source": {
        "web": {
          "site": "https://applink.test-hogehoge.link."
        }
      },
      "relation": "delegate_permission/common.handle_all_urls",
      "target": {
        "androidApp": {
          "packageName": "net.hogehoge.applinksampleapp",
          "certificate": {
            "sha256Fingerprint": "A5:BD:31:79:75:0D:15:4B:2F:8C:68:72:7F:FB:4A:26:48:8E:75:74:BD:40:F5:FE:E3:8F:2B:D7:89:AF:F1:1A"
          }
        }
      }
    }
  ],
  "maxAge": "1852.545771157s"
}
実機
 ※直接ブラウザを起動した場合はできないので多少条件が異なる模様
AWS Transfer Familyを入れてみた
AWS Transfer Family
まー、ざっくりというならAWS上で管理するSFTPサーバって感じ 1日24時間稼働しつづけたら1ヶ月で3万円くらいかかるらしい
ファイルを配備するところとしてはEFSとS3があるようですが、 S3の方が扱いがシンプルそうなため、今回はS3とする
手順の流れ
手順
S3バケットを作成
バケット名を設定
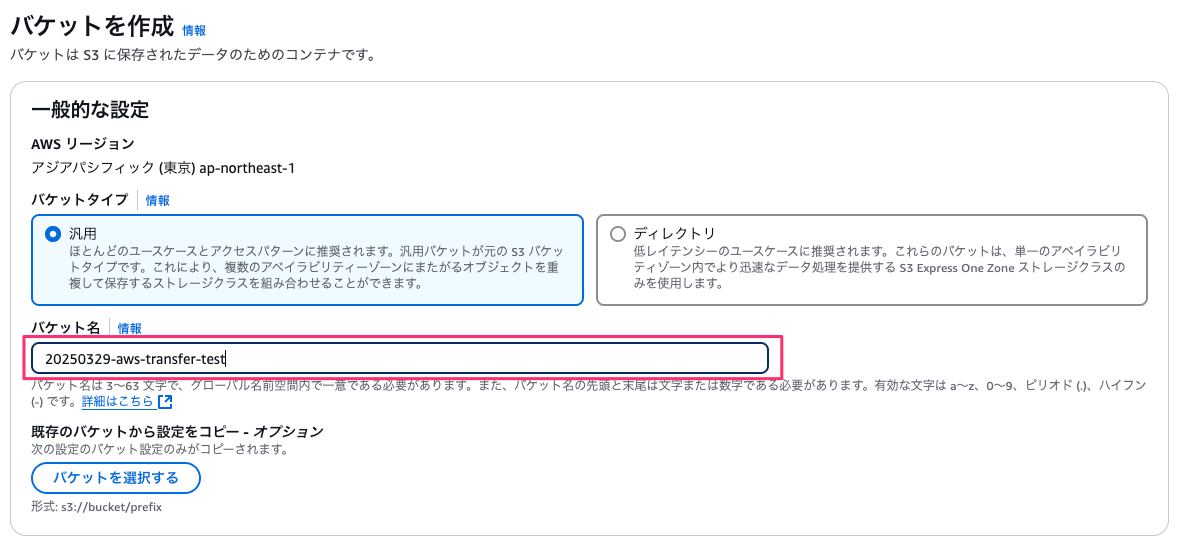
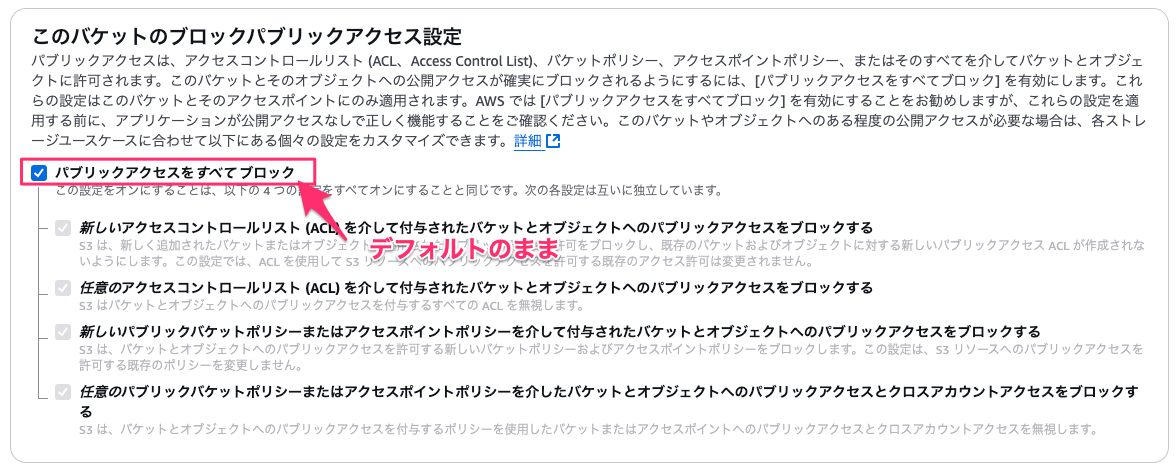
公開しないようにする
IAMロールを作成
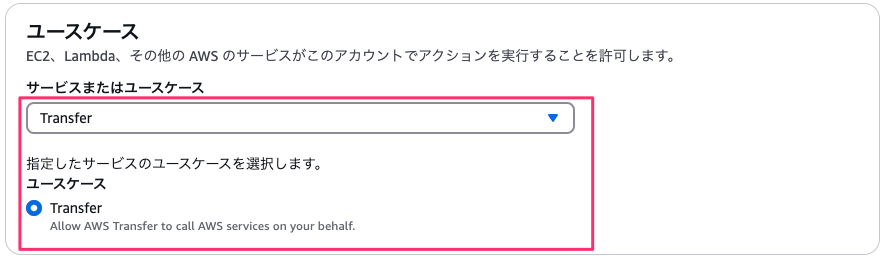
信頼されたエンティティタイプ
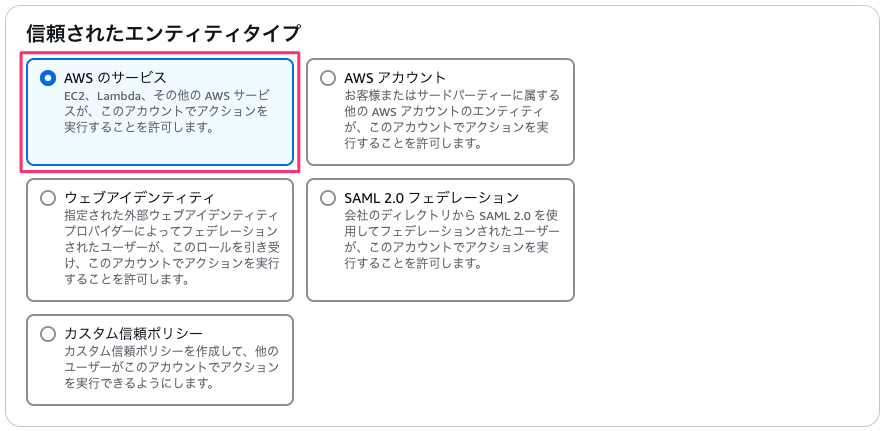
ユースケース
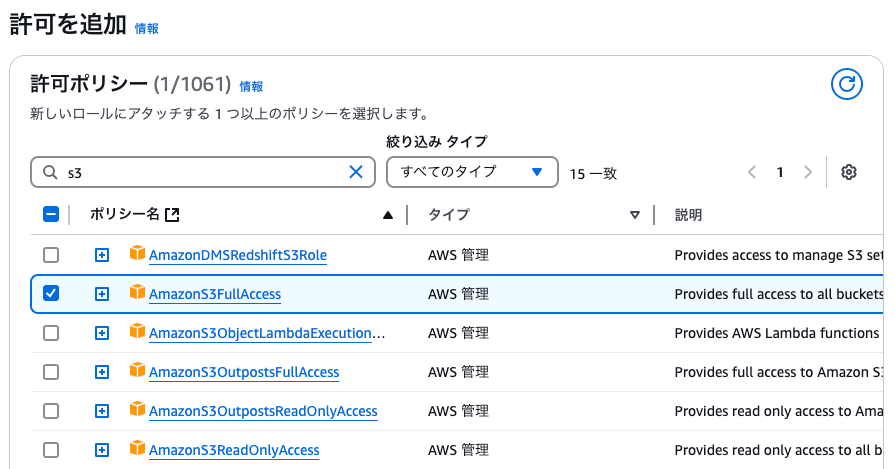
許可として「AmazonS3FullAccess」を追加
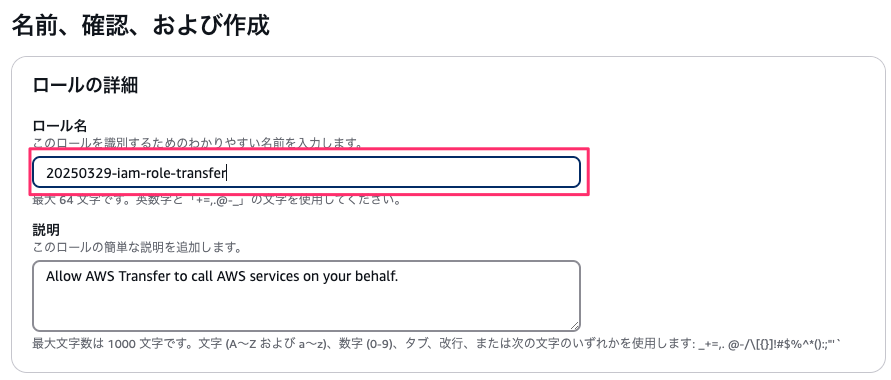
ロール名を設定して、作成
AWS Transfer Familyを作成
サーバを作成

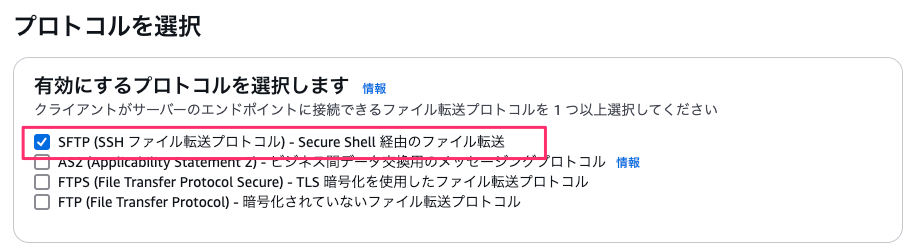
SFTPを指定(デフォルト)
IOプロバイダー(デフォルト)
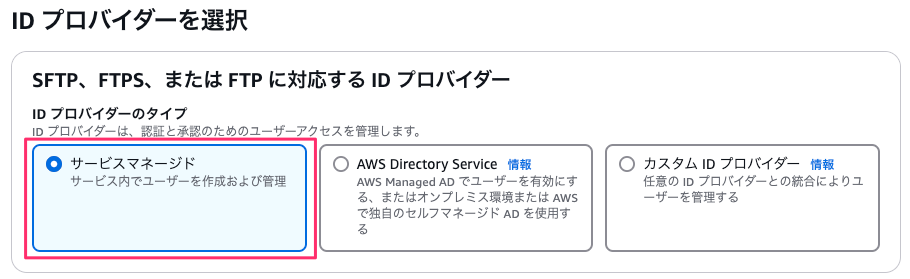
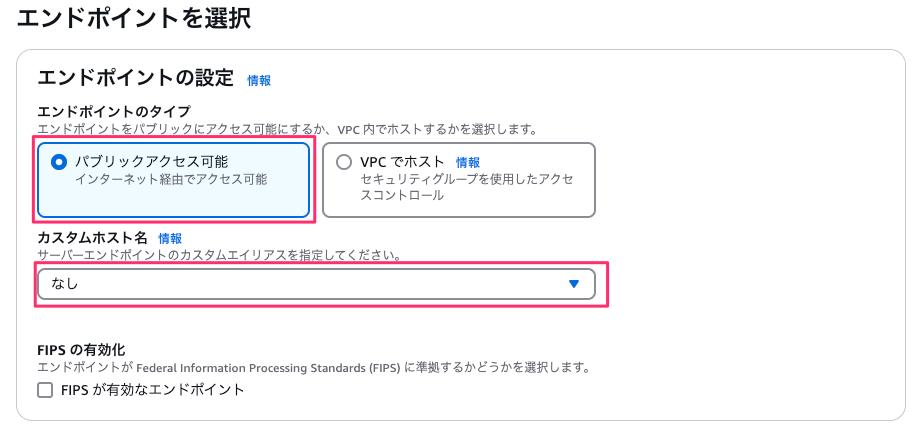
エンドポイント
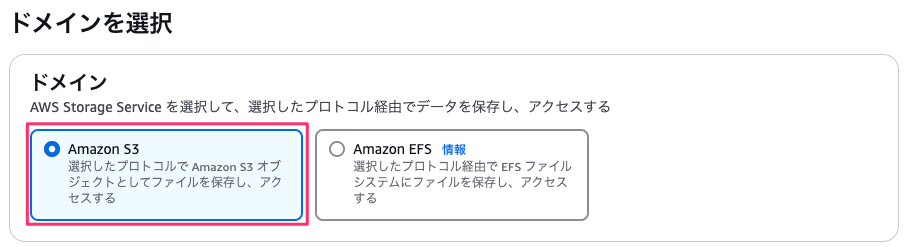
ドメインにS3を指定
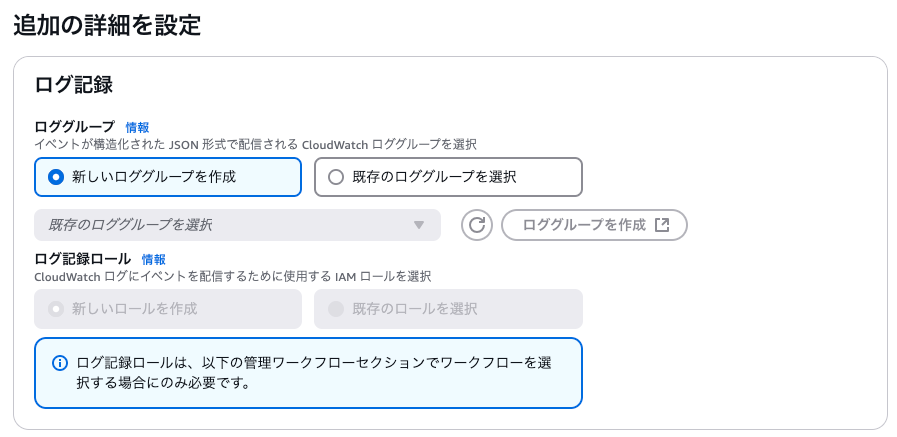
追加の詳細は基本、デフォルトのままでよい
ユーザーなどはあとで追加
↓
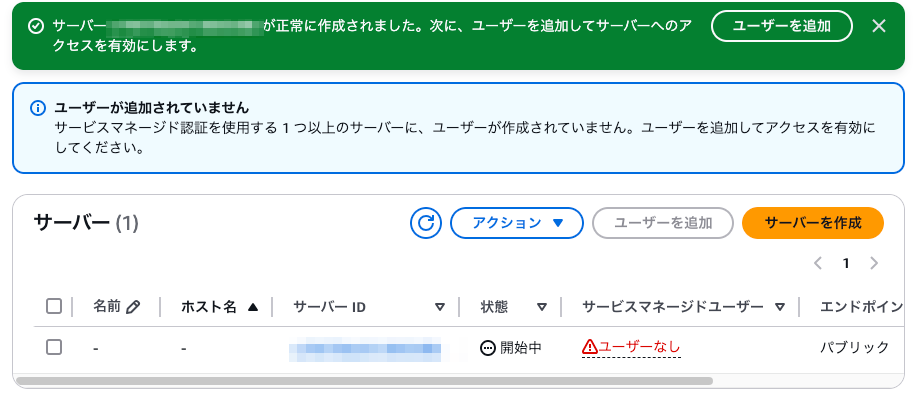
ユーザーを追加
詳細画面より「ユーザーを追加」

ユーザー名、ロール
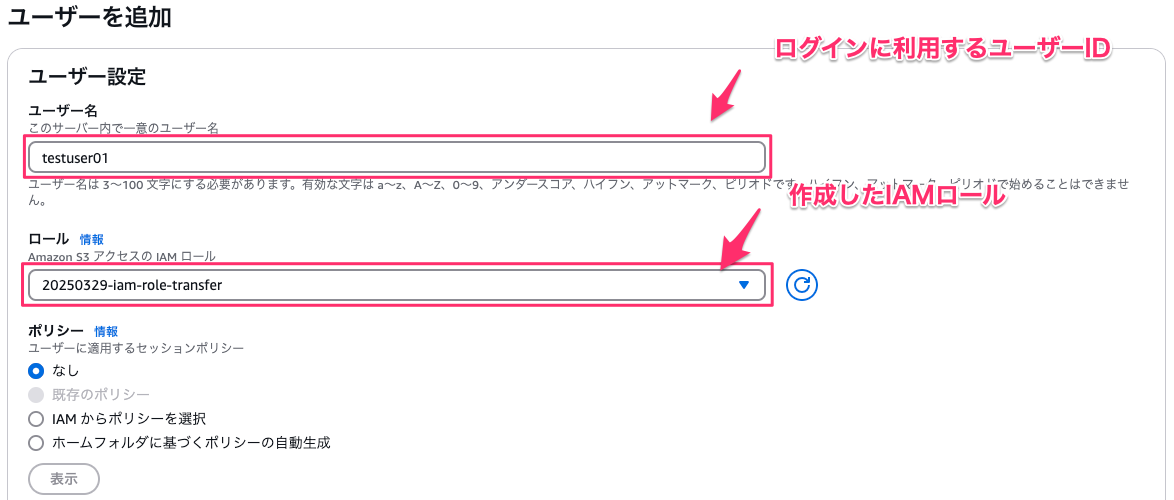
バケット情報

クライアントPCのsshキーの情報を設定

↓

接続確認
% echo "test1" > aaa.txt
% sftp -i ~/.ssh/test_transfer testuser01@xxxxxxxxxxxxx.server.transfer.ap-northeast-1.amazonaws.com
Connected to xxxxxxxxxxxxx.server.transfer.ap-northeast-1.amazonaws.com.
sftp> put aaa.txt
Uploading aaa.txt to /20250329-aws-transfer-test/testuser01/aaa.txt
aaa.txt                                                                                                                       100%    6     0.3KB/s   00:00
sftp> ls
aaa.txt
sftp> exit
%
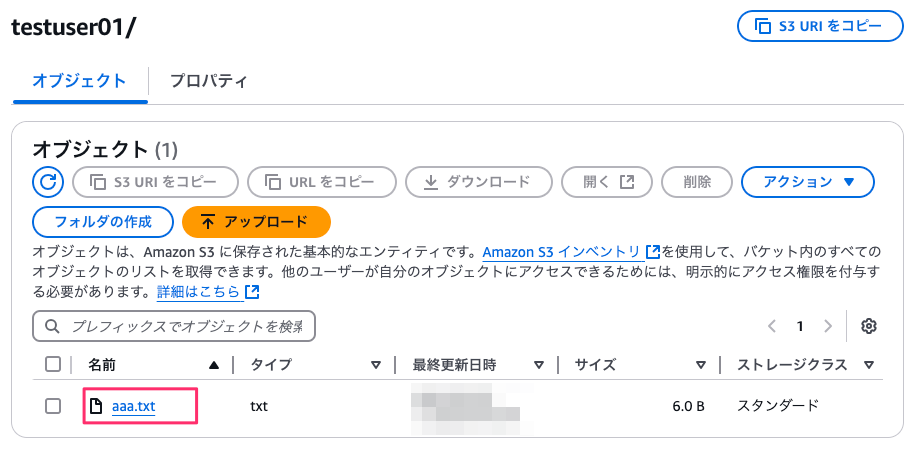
今回はここまで EFSの場合はEC2などを起動する必要がありそうなのでシンプルな構成ができそうなS3でやってみました
参考
tauriを試してみた
Tauriとは?
超簡単にいうと、Web技術とrust を併用してデスクトップやモバイルアプリを作成できるフレームワークみたい
環境
必要なものの簡易的なインストール
node install
curl -o- https://raw.githubusercontent.com/nvm-sh/nvm/v0.40.1/install.sh | bash
nvm install v22.0.0
nvm use v22.0.0
bun install
curl -fsSL https://bun.sh/install | bash
rust install
curl --proto '=https' --tlsv1.2 -sSf https://sh.rustup.rs | sh
各々の細かい設定は別のところから参考にした方がよいかなと
プロジェクト作成
bun create tauri-app test1
cd test1
bun install
bun run tauri android init
bun run tauri ios init
起動
Web
bun run dev
↓

デスクトップアプリ
bun tauri dev
↓

android
NDKが必要
export ANDROID_HOME="/Users/$USER/Library/Android/sdk"
export NDK_HOME="$ANDROID_HOME/ndk/28.0.13004108"
※profileを読み込み直すこと
再度、androidの初期化
bun tauri android init
android起動
bun tauri android dev
↓

ios
bun tauri ios dev
↓

参考
所感
今回は環境設定のみ、複数のWeb、デスクトップ(今回はMac)、Android、iOSで動作することができる模様 フロントエンドのみであればReactなどがわかるのであれれば対応できる模様
以前、react-nativeで作成していた場合は一部はjavascriptなどで対応していて一部GPSやPush通知などの部分は ネイティブの機能で対応していた、Tauriではその辺りの実装がどのようにできるかをみていく
react-native-mapsでgoogle mapのスタイルを試してみた
概要
以下のリンクを見た際、スタイルが変わった模様 Google Maps Platform のドキュメント | Maps SDK for Android | Google for Developers
以下のような感じに変わる模様

実際にブラウザ上も変わっているようです。

どのようにしたら出るのか不明のため。実験
環境
npx @react-native-community/cli@latest init TestApp
react-native-mapsを追加
package.json
{
  "name": "TestApp",
  "version": "0.0.1",
  "private": true,
  "scripts": {
    "android": "react-native run-android",
    "ios": "react-native run-ios",
    "lint": "eslint .",
    "start": "react-native start",
    "test": "jest"
  },
  "dependencies": {
    "react": "18.3.1",
    "react-native": "0.77.0",
    "react-native-maps": "^1.20.1"
  },
  "devDependencies": {
    "@babel/core": "^7.25.2",
    "@babel/preset-env": "^7.25.3",
    "@babel/runtime": "^7.25.0",
    "@react-native-community/cli": "15.0.1",
    "@react-native-community/cli-platform-android": "15.0.1",
    "@react-native-community/cli-platform-ios": "15.0.1",
    "@react-native/babel-preset": "0.77.0",
    "@react-native/eslint-config": "0.77.0",
    "@react-native/metro-config": "0.77.0",
    "@react-native/typescript-config": "0.77.0",
    "@types/jest": "^29.5.13",
    "@types/react": "^18.2.6",
    "@types/react-test-renderer": "^18.0.0",
    "eslint": "^8.19.0",
    "jest": "^29.6.3",
    "prettier": "2.8.8",
    "react-test-renderer": "18.3.1",
    "typescript": "5.0.4"
  },
  "engines": {
    "node": ">=18"
  }
}
App.tsx
/**
 * Sample React Native App
 * https://github.com/facebook/react-native
 *
 * @format
 */

import React from 'react';
import type {} from 'react';
import {
  SafeAreaView,
  StatusBar,
  StyleSheet,
  useColorScheme,
  View,
} from 'react-native';

import {Colors} from 'react-native/Libraries/NewAppScreen';

import MapView, {PROVIDER_GOOGLE} from 'react-native-maps';

/*
 * react-native-mapsで地図を表示
 */
function App(): React.JSX.Element {
  const isDarkMode = useColorScheme() === 'dark';

  const backgroundStyle = {
    backgroundColor: isDarkMode ? Colors.darker : Colors.lighter,
  };

  return (
    <SafeAreaView style={backgroundStyle}>
      <StatusBar
        barStyle={isDarkMode ? 'light-content' : 'dark-content'}
        backgroundColor={backgroundStyle.backgroundColor}
      />
      <View style={styles.container}>
        <MapView
          provider={PROVIDER_GOOGLE}
          style={styles.map}
          region={{
            latitude: 35.6714183,
            longitude: 139.7767189,
            latitudeDelta: 0.013,
            longitudeDelta: 0.013,
          }}></MapView>
      </View>
    </SafeAreaView>
  );
}

const styles = StyleSheet.create({
  container: {
    ...StyleSheet.absoluteFillObject,
    height: 600,
    width: 400,
    justifyContent: 'flex-end',
    alignItems: 'center',
  },
  map: {
    ...StyleSheet.absoluteFillObject,
  },
});

export default App;
鍵発行
鍵を発行して設定を行う

AndroidManifest.xml
      <meta-data
        android:name="com.google.android.geo.API_KEY"
        android:value="Googleコンソール経由で発行したSDK用のAPIキー"/>
実験
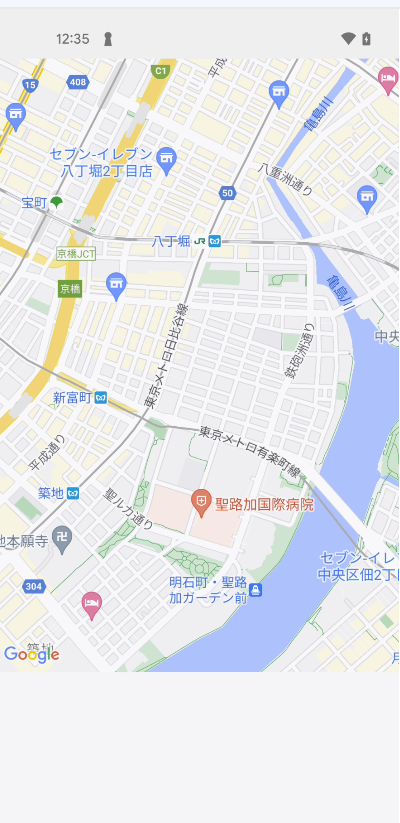
変わらない・・・
地図のスタイルを設定する必要がある模様
地図のスタイル
新規作成してからマップの表示や配色の設定ができるみたい

↓

↓
スタイルを設定して保存・公開


↓
MAPIDを新規追加

↓

↓

↓
地図の下イルを設定

↓

↓

MapViewにMapIDを設定
      <View style={styles.container}>
        <MapView
          provider={PROVIDER_GOOGLE}
          style={styles.map}
          googleMapId="ここにMAP IDを設定"
          region={{
            latitude: 35.6714183,
            longitude: 139.7767189,
            latitudeDelta: 0.013,
            longitudeDelta: 0.013,
          }}></MapView>
      </View>
↓
適用された模様
| 前 | 後 |
|---|---|
| |
 |
RaspberryPiでNetworkManagerでブリッジ対応してみる
前回
他のラズパイを設定して複数のアクセスポイント制御してみようかな?
$ ls -la /etc/network/
total 32
drwxr-xr-x   6 root root  4096 Nov 19 22:33 .
drwxr-xr-x 131 root root 12288 Nov 19 22:46 ..
drwxr-xr-x   2 root root  4096 Nov 19 22:33 if-down.d
drwxr-xr-x   2 root root  4096 Nov 19 22:33 if-post-down.d
drwxr-xr-x   2 root root  4096 Nov 19 22:33 if-pre-up.d
drwxr-xr-x   2 root root  4096 Nov 19 22:33 if-up.d
$
/etc/network/interfacesがない?
レガシーらしい
UbuntuやDebianなどではnetplanやNetworkManagerで対応しないといけない模様
/etc/network/interfacesで設定もできなくはないかもしれないが
今後、/etc/network/interfacesが利用できなくなるとまずいのでNetworkManagerで設定する方法に切り替える
初期設定では以下
- SSHのみ接続可能
ネットワークの設定と最新パッケージの取得を行う
NetworkManagerが動作しているか確認
$ dpkg -l grep network-manager
Desired=Unknown/Install/Remove/Purge/Hold
| Status=Not/Inst/Conf-files/Unpacked/halF-conf/Half-inst/trig-aWait/Trig-pend
|/ Err?=(none)/Reinst-required (Status,Err: uppercase=bad)
||/ Name            Version       Architecture Description
+++-===============-=============-============-=========================================================
ii  grep            3.8-5         armhf        GNU grep, egrep and fgrep
ii  network-manager 1.42.4-1+rpt1 armhf        network management framework (daemon and userspace tools)
$
接続状態の確認(sshで繋いでいるから接続は問題ないけど一応)
$ nmcli general status
STATE      CONNECTIVITY  WIFI-HW  WIFI      WWAN-HW  WWAN
connected  full          enabled  disabled  missing  enabled
$
接続の確認
$ nmcli connection show
NAME                UUID                                  TYPE      DEVICE
Wired connection 1  XXXXXXXX-XXXX-XXXX-XXXX-XXXXXXXXXXXX  ethernet  eth0
lo                  XXXXXXXX-XXXX-XXXX-XXXX-XXXXXXXXXXXX  loopback  lo
$
デバイスのIP情報を取得、、、DNSを修正する
$ nmcli device show eth0 | grep "IP4."
IP4.ADDRESS[1]:                         192.168.11.22/24
IP4.GATEWAY:                            192.168.11.1
IP4.ROUTE[1]:                           dst = 192.168.11.0/24, nh = 0.0.0.0, mt = 100
IP4.ROUTE[2]:                           dst = 0.0.0.0/0, nh = 192.168.11.1, mt = 100
IP4.DNS[1]:                             192.168.11.1
$
DNS更新して再起動
sudo nmcli connection modify "Wired connection 1" ipv4.dns "8.8.8.8 8.8.4.4"
sudo nmcli connection modify "Wired connection 1" ipv6.method ignore
sudo nmcli connection modify "Wired connection 1" ipv4.ignore-auto-dns yes
sudo nmcli connection down "Wired connection 1"
sudo nmcli connection up "Wired connection 1"
aptを最新&パッケージを取得
sudo apt update -y
sudo apt upgrade -y
sudo apt install hostapd bridge-utils -y
ブリッジを作成
connection追加
$ sudo nmcli connection add type bridge con-name br0 ifname br0
Connection 'br0' (XXXXXXXX-XXXX-XXXX-XXXX-XXXXXXXXXXXX) successfully added.
$
connectionの設定を変更
sudo nmcli connection modify br0 ipv4.method manual ipv4.addresses "192.168.11.51/24" ipv4.gateway 192.168.11.1
sudo nmcli connection modify br0 ipv6.method ignore
sudo nmcli connection modify br0 ipv4.gateway 192.168.11.1
sudo nmcli connection modify br0 ipv4.dns "8.8.8.8 8.8.4.4"
sudo nmcli connection modify br0 ipv4.ignore-auto-dns yes
ethernetをブリッジに追加
sudo nmcli connection add type ethernet con-name br0-slave-eth0 ifname eth0 master br0
↓
$ nmcli connection show
NAME                UUID                                  TYPE      DEVICE
br0                 XXXXXXXX-XXXX-XXXX-XXXX-XXXXXXXXXXXX  bridge    br0
Wired connection 1  XXXXXXXX-XXXX-XXXX-XXXX-XXXXXXXXXXXX  ethernet  eth0
homeWifi            XXXXXXXX-XXXX-XXXX-XXXX-XXXXXXXXXXXX  wifi      wlan0
lo                  XXXXXXXX-XXXX-XXXX-XXXX-XXXXXXXXXXXX  loopback  lo
br0-slave-eth0      XXXXXXXX-XXXX-XXXX-XXXX-XXXXXXXXXXXX  ethernet  --
$
元々のeth0の接続が生きているので切って、slaveの方を起動
sudo nmcli connection down "Wired connection 1"
sudo nmcli connection up   "br0-slave-eth0"
↓
br0-slave-eth0      XXXXXXXX-XXXX-XXXX-XXXX-XXXXXXXXXXXX  ethernet  eth0
Wired connection 1  XXXXXXXX-XXXX-XXXX-XXXX-XXXXXXXXXXXX  ethernet  --
ネットワーク再起動
sudo systemctl restart NetworkManager
br0にeth0が所属していれば一応成功
$ brctl show
bridge name bridge id       STP enabled interfaces
br0         8000.XXXXXXXXXXX    yes     eth0
$
アクセスポイント化する
hostapdの設定値は以下と同じ
m-shige1979.hatenablog.com
↓
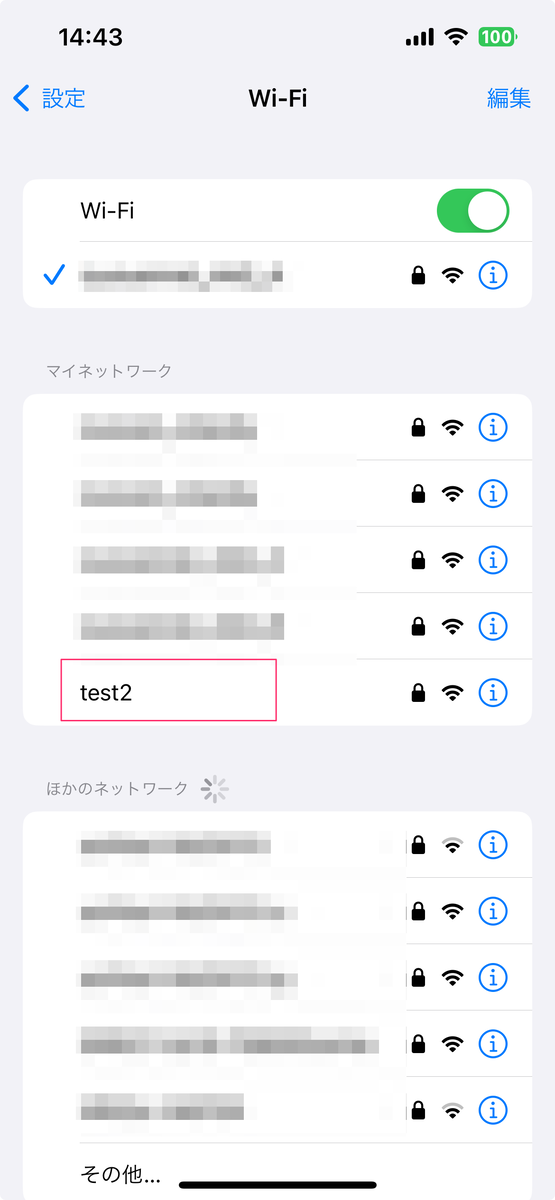
注意点
ラズパイを再起動するとネットワークの設定などが"Wired connection 1"となるため、
起動時に再設定が必要なため、注意
$ nmcli connection show
NAME                UUID                                  TYPE      DEVICE
Wired connection 1  XXXXXXXX-XXXX-XXXX-XXXX-XXXXXXXXXXXX  ethernet  eth0
lo                  XXXXXXXX-XXXX-XXXX-XXXX-XXXXXXXXXXXX  loopback  lo
br0                 XXXXXXXX-XXXX-XXXX-XXXX-XXXXXXXXXXXX  bridge    --
br0-slave-eth0      XXXXXXXX-XXXX-XXXX-XXXX-XXXXXXXXXXXX  ethernet  --
$
↓
ブリッジ用のものを起動しなおしてhostapdを再起動する
sudo nmcli connection down "Wired connection 1"
sudo nmcli connection up   "br0"
sudo nmcli connection up   "br0-slave-eth0"
sudo systemctl restart hostapd
所感
有線LANでネット通信などを行うが、設定途中で切断が切れる状態になりがちなのは なんとかしたいかも SSHで対応するのであれば別途、USBとかで経路を作成してそっちから接続するか、別途Wifiを追加するかの2択になりそう
