go言語の学習:構造体よりタグ情報を取得
構造体にあるjsonなどのタグより取得
package main

import (
	"fmt"
	"reflect"
)

type Sample struct {
	no    int     `sampletag:"aaaaa"`
	name  string  `sampletag:"bbbbb"`
	age   int     `sampletag:"ccccc"`
}

func main() {
	fmt.Println("start")

	// Sample1インターフェースを定義
	var sample1 Sample

	// 型の取得
	t := reflect.TypeOf(sample1)

	// タグの情報を取得
	for i:=0;i<t.NumField();i++ {
		item := t.Field(i)
		fmt.Printf("index: %2d, name:%10s, type:%10s, tag:%10s\n",
			i, item.Name, item.Type.Name(), item.Tag.Get("sampletag"))
	}

	fmt.Println("end")
}
↓
start
index:  0, name:        no, type:       int, tag:     aaaaa
index:  1, name:      name, type:    string, tag:     bbbbb
index:  2, name:       age, type:       int, tag:     ccccc
end
DBのORMやjsonのエンコード、デコードなどで使用されている
タグ情報を設定することで構造体の項目のバリデーションなどにも併用できる感じ…
go言語の学習:ポリモーフィズムのパターン
Javaとかではクラスにinterfaceとか定義して使用する
goの場合は構造体自体はメソッドを実装するが、定義されているインターフェースは定義しない
サンプル
package main

import (
	"fmt"
)


// Sample1インターフェース、メソッドを定義
type Sample1 interface {
	Print()
}

// Hoge構造体、Printメソッドを用意
type Hoge struct {
	a int
}
func (c Hoge) Print() {
	fmt.Println("hoeghoge")
	fmt.Println(c.a)
}

// Foo構造体、Printメソッドを用意
type Foo struct {
	a int
}
func (c Foo) Print() {
	fmt.Println("foofoo")
	fmt.Println(c.a)
}

func main() {
	fmt.Println("start")

	// Sample1インターフェースを定義
	var sample1 Sample1

	// 構造体を生成
	hoge := Hoge{a: 100}
	foo  := Foo{a: 500}

	// sample1変数にHoge構造体を設定して実行
	sample1 = hoge
	sample1.Print()

	// sample1変数に Foo構造体を設定して実行
	sample1 = foo
	sample1.Print()

	fmt.Println("end")
}
interface型に共通の呼び出したいメソッドを定義しておくことで実行することが可能
しかし、この場合はSample1を定義しておかないといけない
var sample1 interface{}
のように定義していないinterfaceを使用した場合は動かすことができるか?
↓
typeで定義されたメソッドを使用前に定義することで
対応は可能、しかし、設定された変数には定義されていないこともあるため、型アサーションで存在チェックすることが必要
	// Sample1インターフェース、メソッドを定義
	type Sample1 interface {
		Print()
	}

	// sample1変数にHoge構造体を設定して実行
	sample1 = hoge
	a, ok := sample1.(Sample1)
	if !ok {
		fmt.Println("Print実行不可")
		return
	}
	a.Print()
所感
まああれかな、JavaでObject型で受け取ってどのクラス情報を保持するかみたいな感じと思います。
今回でいうとinterface型で定義して受け取って入れば対象のinterfaceのメソッドに応じて処理を切り替えられる感じ
interface型の仕組みを上手く理解していないのでこのあたり考えて対応する必要がありそうです。
go言語の学習:interface型の値設定について
interface型は基本的にはどんな値も設定できる
package main

import (
	"fmt"
)

func main() {
	fmt.Println("start")

	var a interface{}

	a = int(10)
	a = int64(10)
	a = string(65)

	fmt.Printf("%+v\n", a)
	fmt.Println("end")
}
設定はできる…
しかし、そのままでは文字列連結や加算、減算などはできないようになっている感じ
型変換
package main

import (
	"fmt"
)

func main() {
	fmt.Println("start")

	var a interface{}

	a = int(10)
	a = a.(int) * 100

	fmt.Printf("%+v\n", a)
	fmt.Println("end")
}
「変数.(設定されている値のデータ型)」でその値へ変換してくれます
リフレクションでinterfaceに設定されたデータ型を確認できる
package main

import (
	"fmt"
	"reflect"
)

func main() {
	fmt.Println("start")

	var a interface{}
	var v reflect.Value

	a = int(10)
	v = reflect.ValueOf(a)
	fmt.Printf("a(type): %+v\n", v.Type())

	a = int64(100)
	v = reflect.ValueOf(a)
	fmt.Printf("a(type): %+v\n", v.Type())

	a = "aaaaaaaaaa"
	v = reflect.ValueOf(a)
	fmt.Printf("a(type): %+v\n", v.Type())

	fmt.Printf("%+v\n", a)
	fmt.Println("end")
}
↓
start
a(type): int
a(type): int64
a(type): string
aaaaaaaaaa
end
まとめ
構造体とか定義せずにいい感じのデータ型が混ざったやつって定義したいなぁぁぁぁ
go言語の学習:typeでインターフェースを定義
概要
interface自体はstructを利用してする感じと認識している
構造体とかとなんかごっちゃになっていてJavaのクラスとかと勝手が異なるので混乱している
そもそもstringやintにメソッドは付与できるのか?
type data1 string
type data2 int
こんな感じで定義するらしい
関数?メソッド?を入れたい場合は構造体でクラスを定義したときと同じ感じでいける
サンプル
package main

import (
	"fmt"
)

func main() {
	fmt.Println("start")

	var a data1
	a = "aaaaaaa"
	a.test1()
	a.test2()
	a.clear()
	fmt.Println("sample1:" + a)

	var b data2
	b = 50
	b.add()
	fmt.Printf("sample2:%d\n", b)

	fmt.Println("end")
}

// dataというインターフェースの定義
type data1 string
type data2 int

// サンプルメソッド
func(c *data1) test1() {
	fmt.Println("test1:" + *c)
}

// サンプルメソッド
func(c *data1) test2() {
	fmt.Println("test2: [" + *c + "]")
}

// サンプルメソッド
func(c *data1) clear() {
	*c = ""
}

// サンプルメソッド
func (c *data2) add() {
	*c *= 100
}
インターフェースという考えがうまく理解できていないのでこのような
記載はあまりできなかった(´・ω・`)
まとめ
typeを使用してインターフェース型として定義すれば
string、intでメソッドを付与できる
わざわざ構造体を定義したくない場合はこちらで対応可能
Google Homeアプリを作成
AIスピーカー

こんなやつ
やること
- FirebaseでAPIを作成
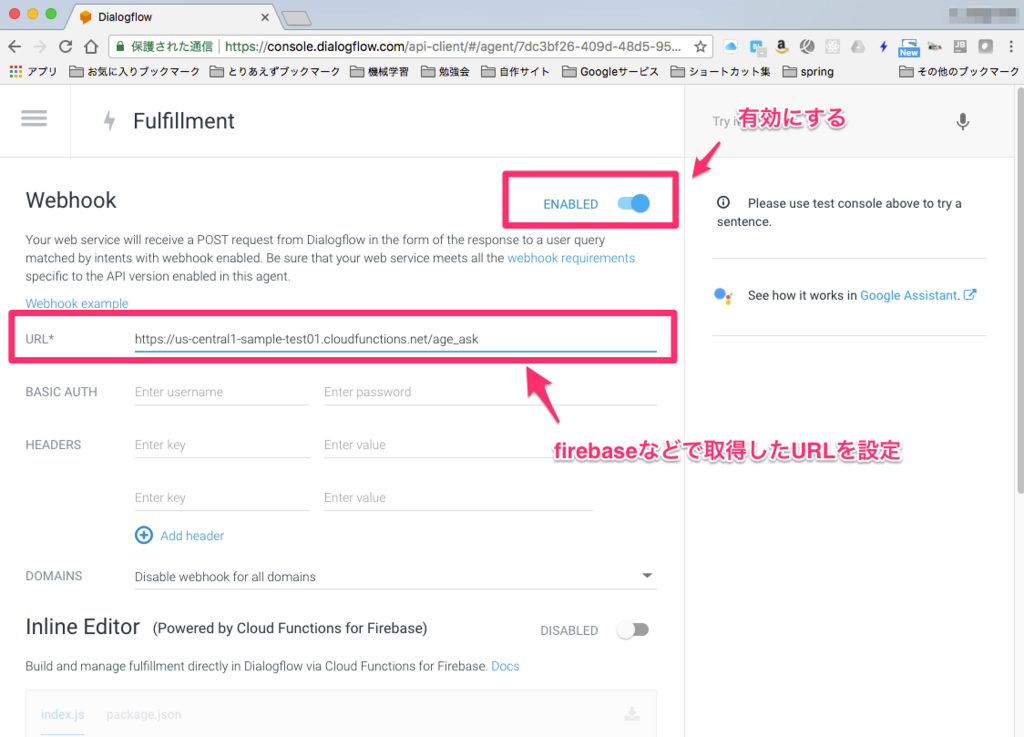
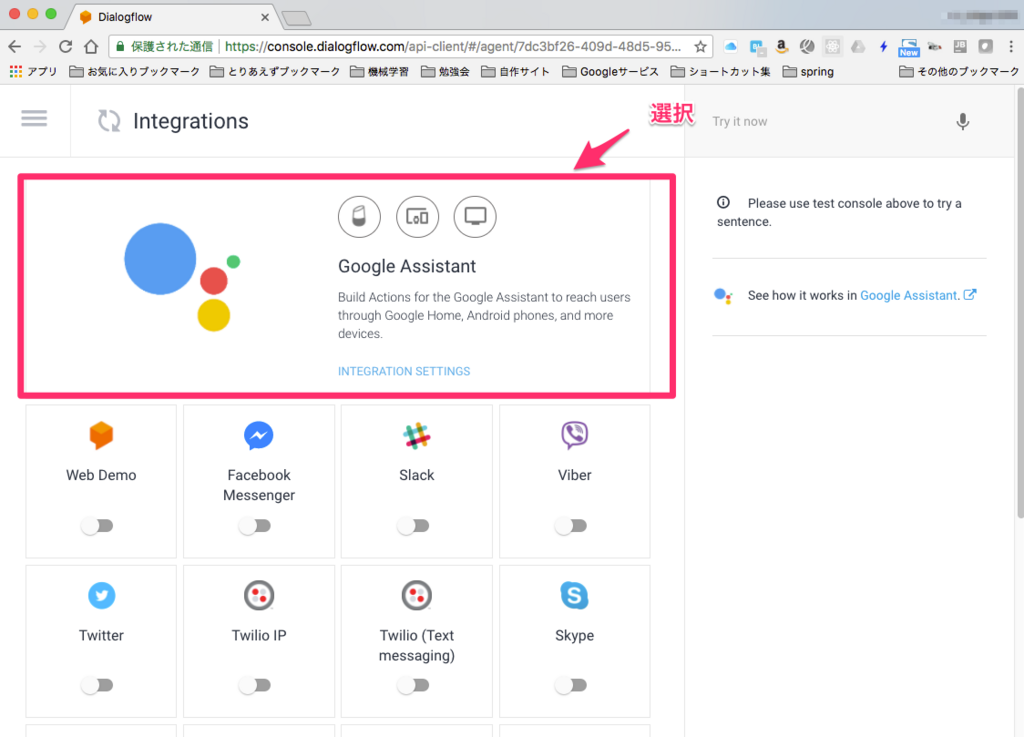
- Actions on Googleでプロジェクトを作成し、APIを紐づけ
APIを作成
プロジェクト作成
firebase init functions
npm install firebase-functions@latest firebase-admin@latest --save
npm install --save actions-on-google
ソースコード
'use strict'

process.env.DEBUG = 'actions-on-google:*';
const App = require('actions-on-google').DialogflowApp;
const functions = require('firebase-functions');

const NAME_ACTION = "age_check";

exports.age_ask = functions.https.onRequest((request, response) => {
    const app = new App({ request, response });

    function test1(app) {
        let age = app.getArgument("age");
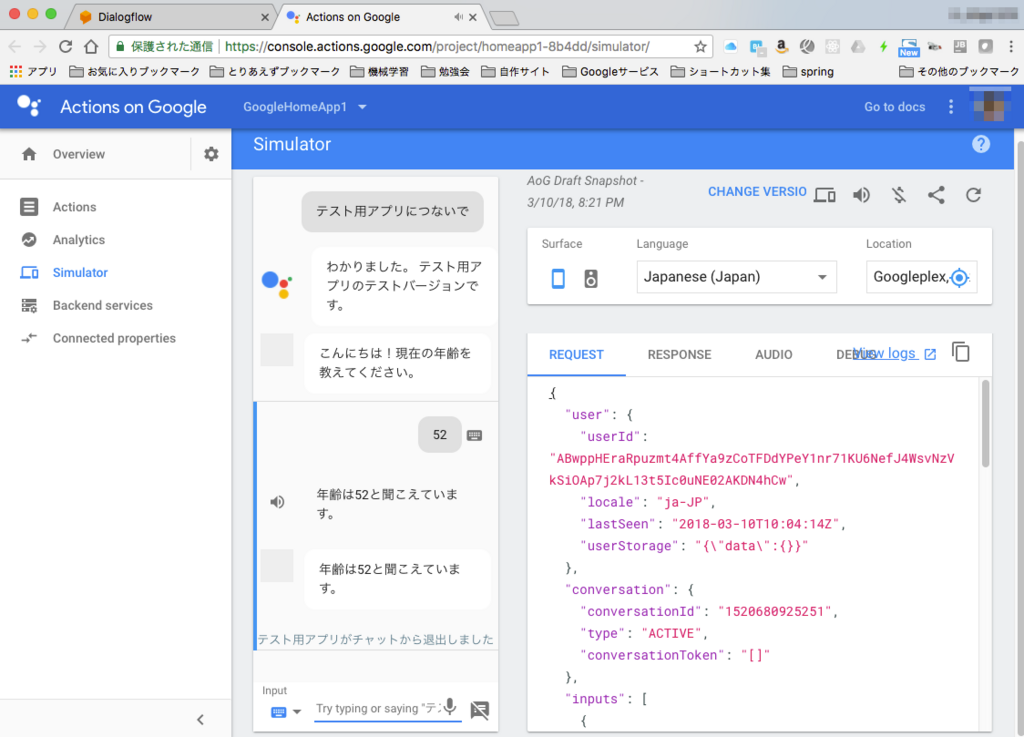
        app.tell("年齢は" + age + "と聞こえています。");
    }

    let actionMap = new Map();
    actionMap.set(NAME_ACTION, test1);

    app.handleRequest(actionMap);
});
デプロイ
firebase deploy --only functions:age_ask
プロジェクト作成
https://console.actions.google.com/へアクセスし、新規プロジェクトを追加

プロジェクト名や国を設定
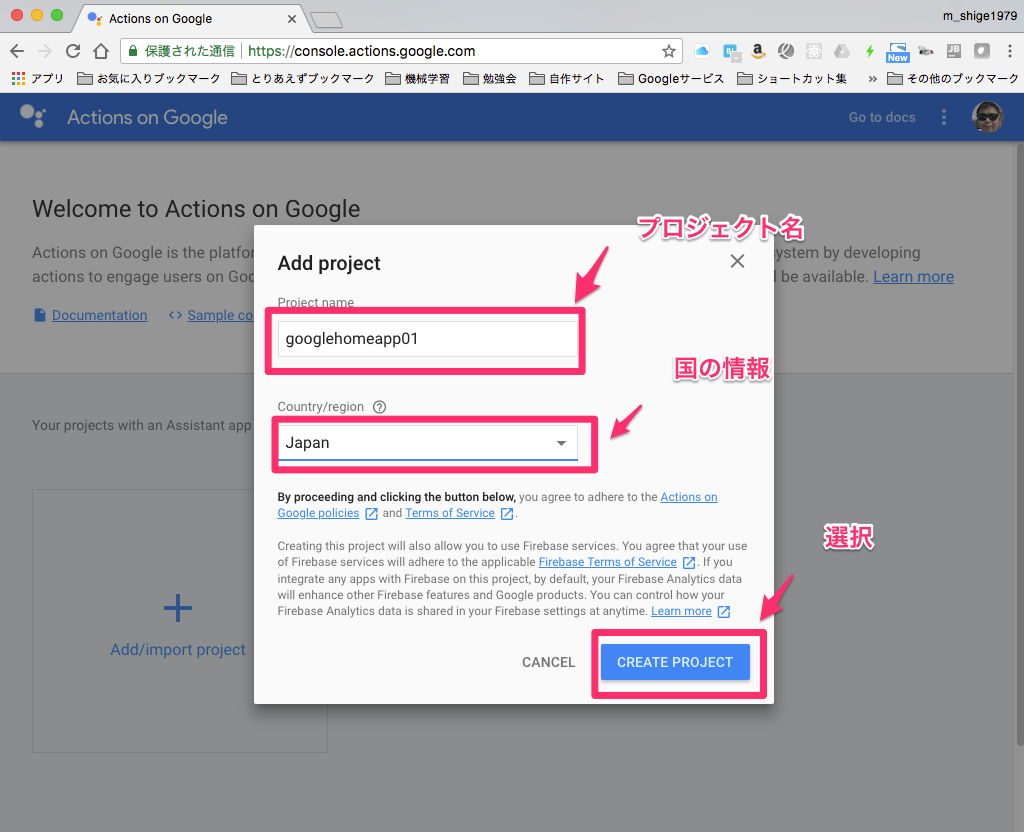
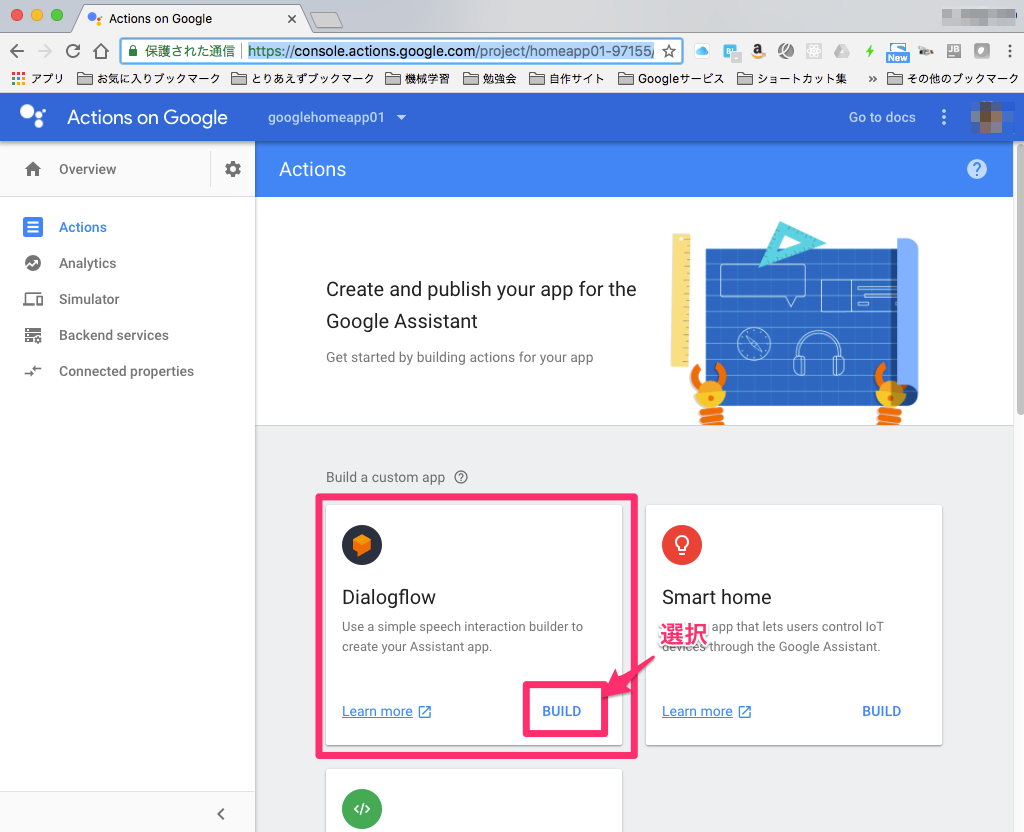
dialogflowの BUILDを選択
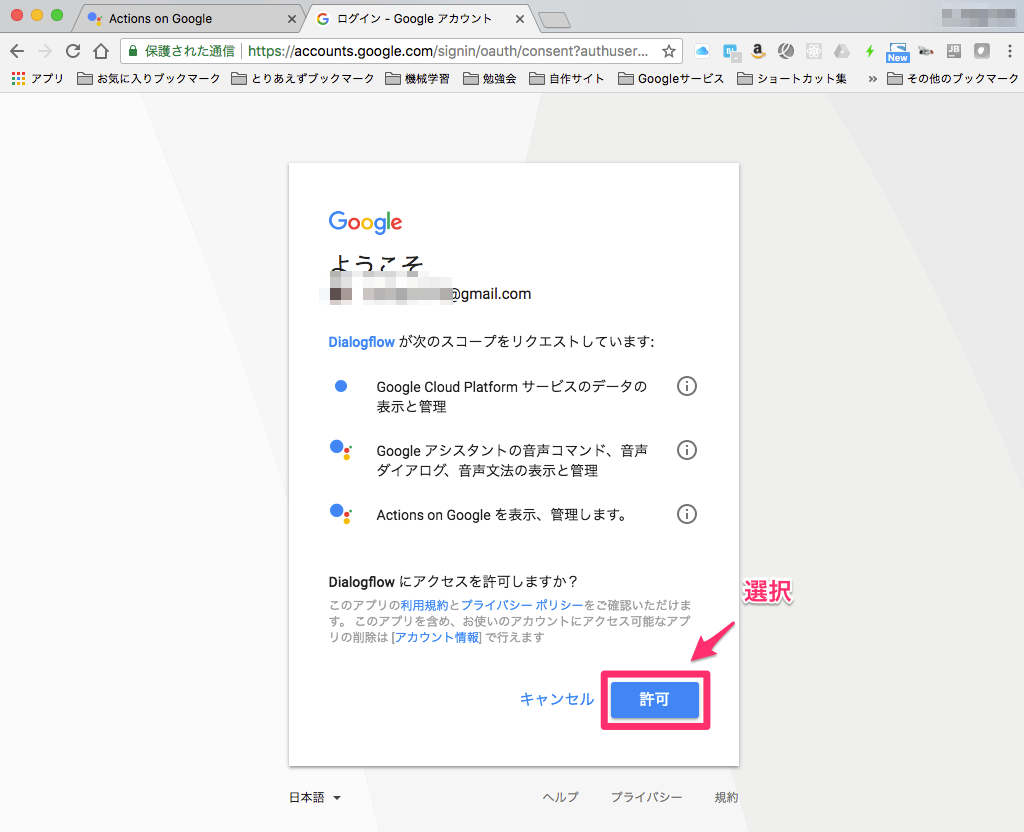
アカウントを選択

対象の権限を許可
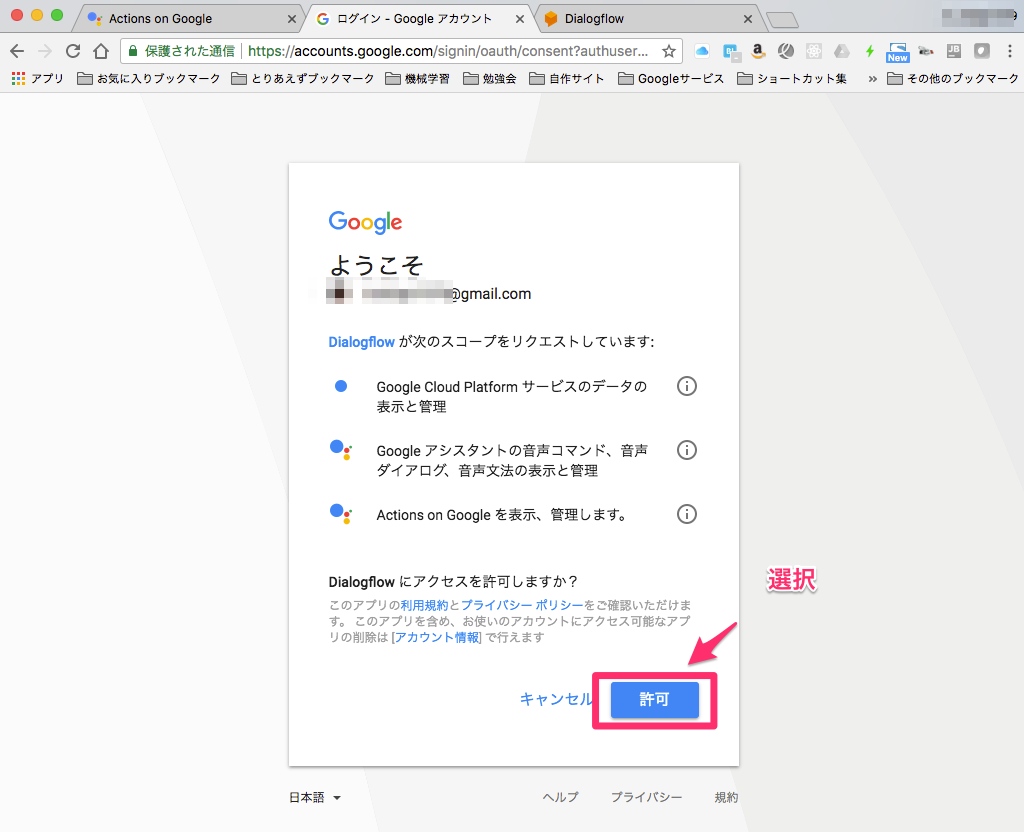
国情報や同意にチェック

特定のアプリに対する許可を設定
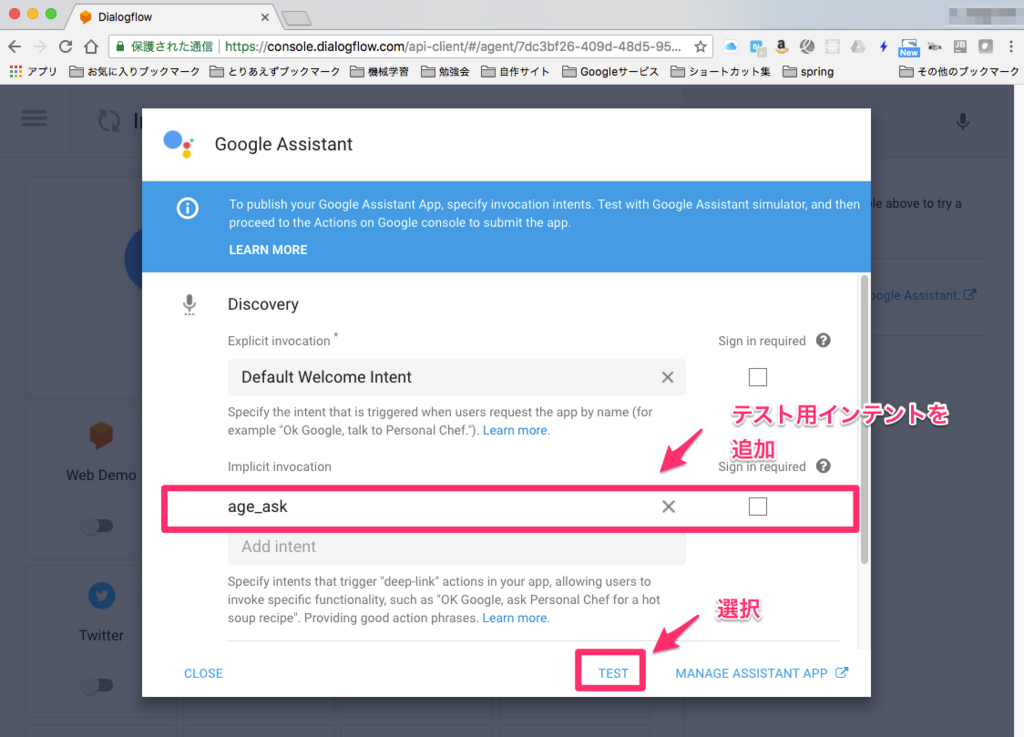
Agentを追加する
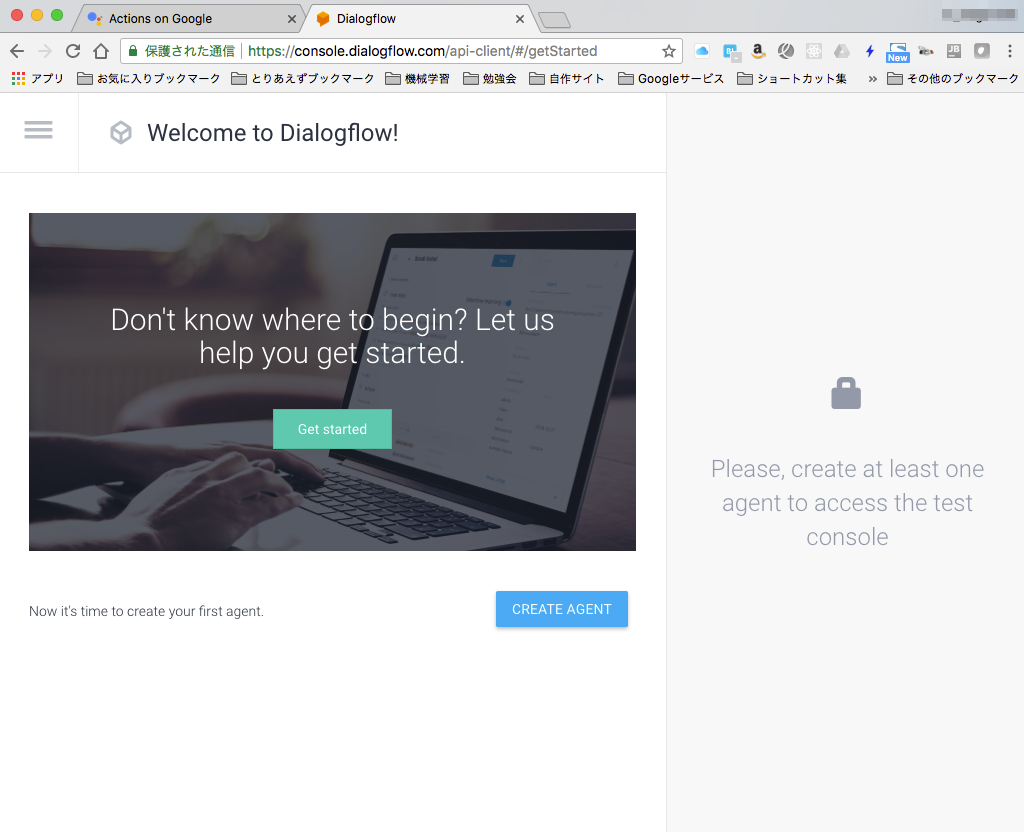
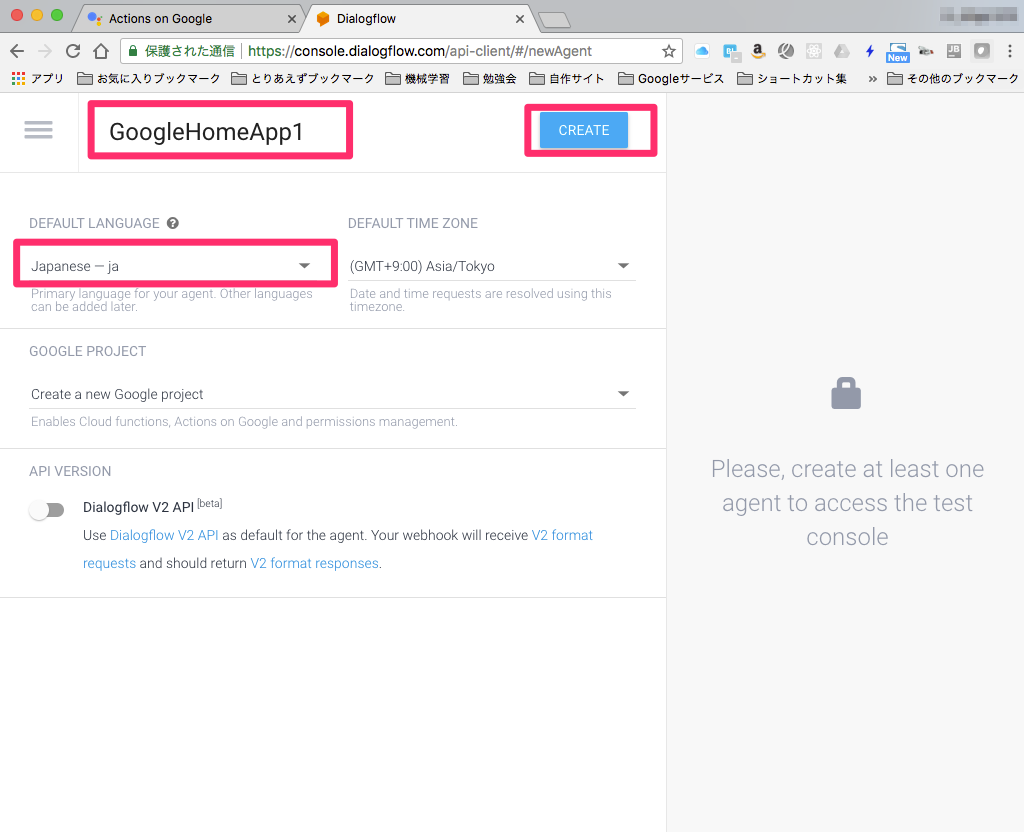
Agentの名称などを設定
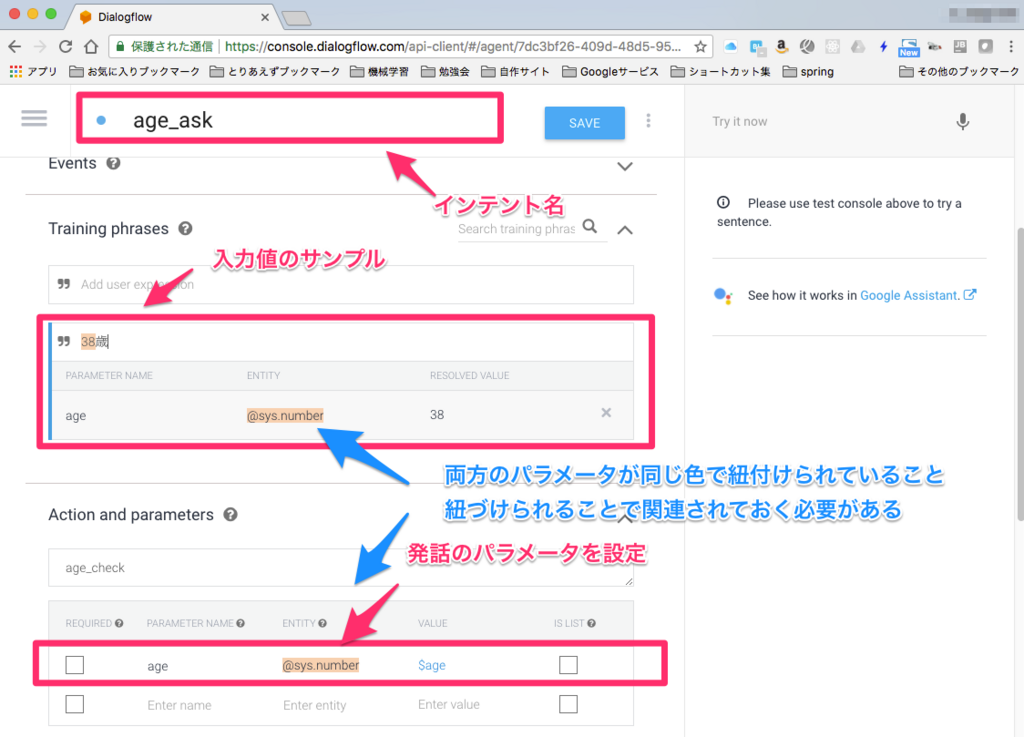
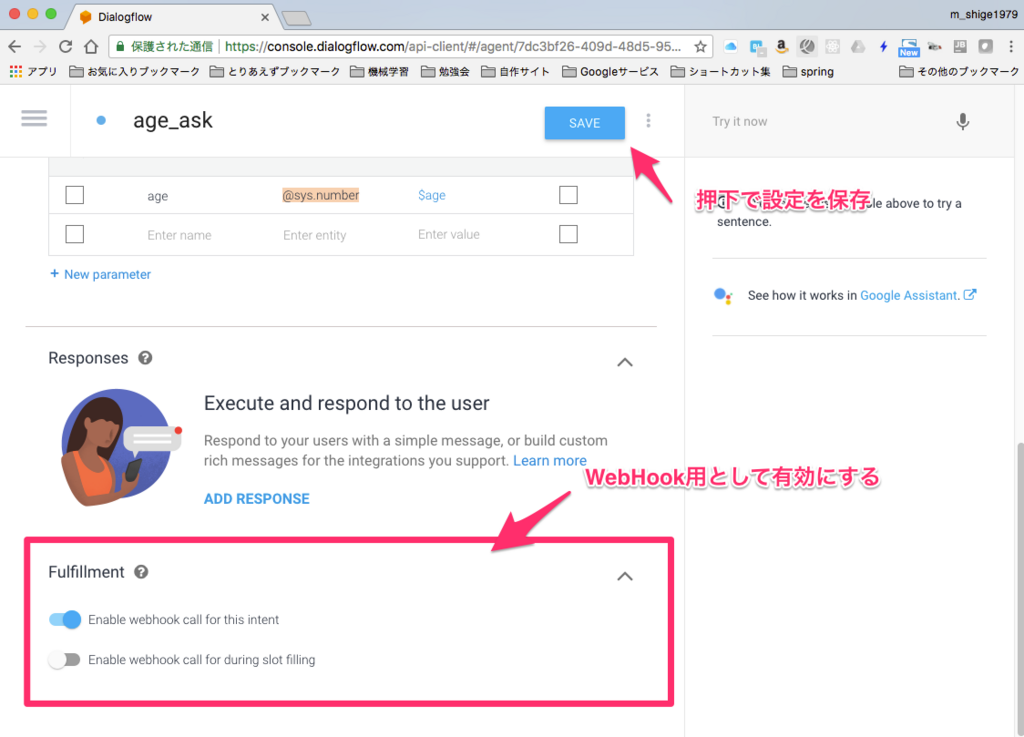
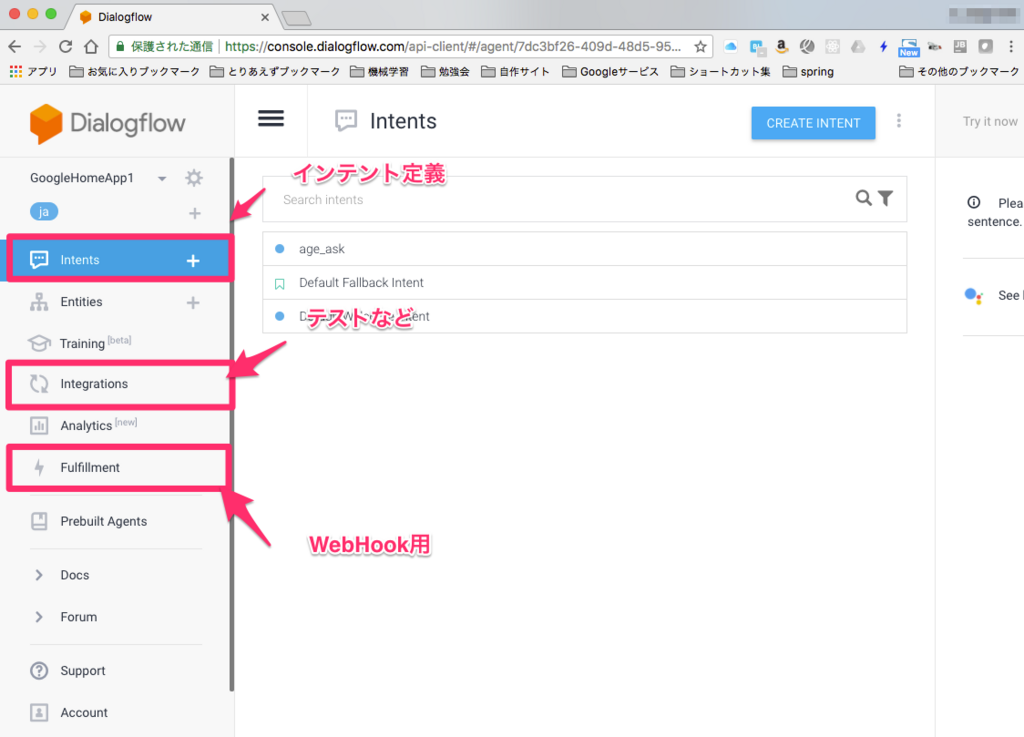
インテントを確認

メニュー確認
firebaseのfunctionsを作成してみた
firebase
Google用のサービスのBaasみたいのようです。
無料プランもあるので簡単にお試ししてみました。
functionとは
APIとかを作成できるサービス
サポートしているものはJavascript及びTypeScriptのようです。
準備
Nodejs(v6.11.5)
手順
firebaseツールのインストール
npm install -g firebase-tools
※使用環境に応じてsudoコマンドを設定する必要があります
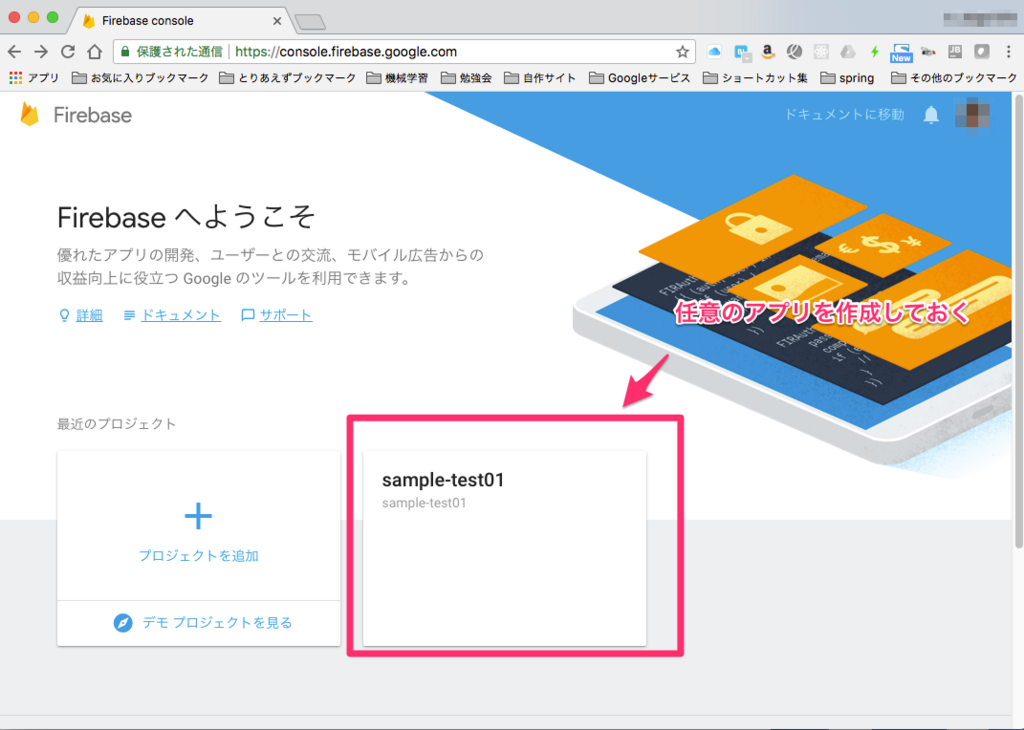
以下へアクセスし任意のアプリを作成する
アプリ作成
ディレクトリ作成
mkdir -p work/firebase_samples/sample_test1
cd work/firebase_samples/sample_test1
アプリ初期化
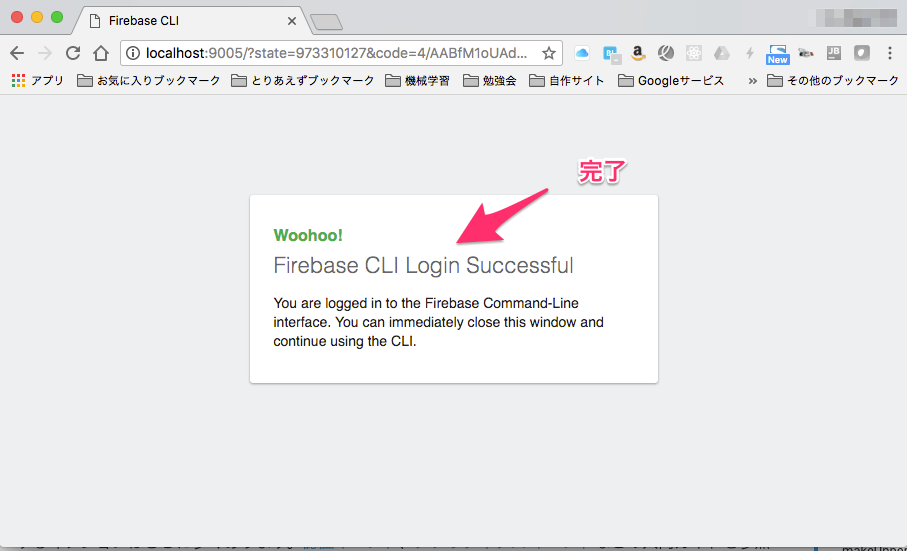
firebase init functions
対象のプロジェクトを選択
? Select a default Firebase project for this directory:
  [don't setup a default project]
❯ sample-test01 (sample-test01)
  [create a new project]
各問い合わせ設定
? What language would you like to use to write Cloud Functions? JavaScript
? Do you want to use ESLint to catch probable bugs and enforce style? Yes
? What language would you like to use to write Cloud Functions? (Use arrow keys)
ファイル編集
functions/index.js
onst functions = require('firebase-functions');

// // Create and Deploy Your First Cloud Functions
// // https://firebase.google.com/docs/functions/write-firebase-functions
//
exports.sampleapp1 = functions.https.onRequest((request, response) => {
  response.send("Hello from Firebase! Sample App1");
});
デプロイ
firebase deploy --only functions
↓
✔  functions: Finished running predeploy script.
i  functions: ensuring necessary APIs are enabled...
✔  functions: all necessary APIs are enabled
i  functions: preparing functions directory for uploading...
i  functions: packaged functions (2.35 KB) for uploading
✔  functions: functions folder uploaded successfully
i  functions: creating function sampleapp1...
✔  functions[sampleapp1]: Successful create operation.
Function URL (sampleapp1): https://us-central1-sample-test01.cloudfunctions.net/sampleapp1

✔  Deploy complete!

Project Console: https://console.firebase.google.com/project/sample-test01/overview
結果
curl https://us-central1-sample-test01.cloudfunctions.net/sampleapp1
Hello from Firebase! Sample App1
【備忘】AWSのDyanmoDBのCLIコマンドについて
DynamodDBの学習を一部していて
ちょっと簡単なコマンドの基本をメモ
テーブル操作系
テーブルの作成
aws dynamodb create-table --table-name 'test1' \
    --attribute-definitions '[{"AttributeName":"id","AttributeType": "S"}]' \
    --key-schema '[{"AttributeName":"id","KeyType": "HASH"}]' \
    --provisioned-throughput '{"ReadCapacityUnits": 5,"WriteCapacityUnits": 5}'
テーブルの一覧
aws dynamodb list-tables
テーブルの削除
aws dynamodb delete-table --table-name test1
データ取得系
データ取得
aws dynamodb scan --table-name test1
データ取得(件数のみ)
aws dynamodb scan --table-name test1 --select COUNT
条件指定
aws dynamodb get-item --table-name test1  \
    --key '{ "id": {"S": "1" }  }'
データ登録系
追加
aws dynamodb put-item --table-name test1 \
    --item '
    {
        "id": { "S": "1" },
        "data1": { "N": "100" },
        "date2": { "S": "aaaaaaa" },
        "data3": { "S": "bbbbbbb" }
    }'
更新1
aws dynamodb update-item --table-name test1 \
    --key '{ "id": {"S": "1"} }' \
    --attribute-updates '
    {
        "data1": {
            "Action": "PUT",
            "Value": {"S": "300" }
        }
    }'
更新2
aws dynamodb update-item --table-name test1 \
    --key '{ "id": {"S": "1"} }' \
    --update-expression 'SET data1 = :param1' \
    --expression-attribute-values '{
        ":param1": {"N":"90000"}
    }'
削除
aws dynamodb delete-item --table-name test1 \
    --key '{ "id": {"S": "1"} }'
まだ条件はいろいろありますが基本的な部分のみ抜粋
